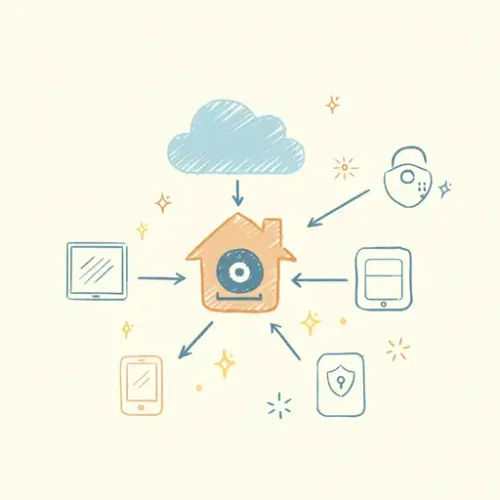
Unifying Your Digital Life: Advanced Home Assistant Integration with Nextcloud

NGC 224
DIY Smart Home Creator
In the evolving landscape of smart home technology, the desire for privacy, control, and data ownership is paramount. While convenience often comes from cloud services, data sovereignty can be a trade-off. This is where Home Assistant and a self-hosted Nextcloud instance shine. Integrating these two powerful open-source platforms creates a synergy that enhances privacy, centralizes data, and unlocks unique automation possibilities.
Why Integrate Home Assistant with Nextcloud?
This integration bridges your physical smart home with your digital data, offering:
- Enhanced Privacy & Data Ownership: Keep sensitive smart home data (e.g., camera snapshots, sensor logs) on your own server, away from third-party clouds.
- Centralized Data Management: Store all relevant smart home-generated data in one accessible, version-controlled location.
- Rich Notifications: Leverage Nextcloud Talk for secure, private, and feature-rich notifications.
- Advanced Automations: Create sophisticated workflows that react to smart home events by storing/retrieving data from Nextcloud.
Prerequisites for Integration
Ensure you have:
- A running Home Assistant Instance: OS or Supervised preferred.
- A running Nextcloud Instance: Self-hosted and accessible via HTTPS (e.g., with Nginx Proxy Manager or Traefik).
- Basic Networking Knowledge: Understanding of IP addresses, ports, and reverse proxies.
- Nextcloud Talk App: Installed and enabled in your Nextcloud instance.
Core Integration: Nextcloud Talk for Notifications
Using Nextcloud Talk as a notification service in Home Assistant is straightforward, allowing you to send messages and images to specific users or group conversations.
Setup Steps:
- Enable Nextcloud Talk App: In your Nextcloud instance, navigate to Apps -> Office & text -> Enable "Talk".
- Generate an App Password (Recommended): Go to your Nextcloud User Settings -> Security -> App passwords for better security.
- Add Integration in Home Assistant: Go to Settings -> Devices & Services -> Add Integration. Search for "Nextcloud Talk". Enter your Nextcloud URL (e.g.,
https://your.nextcloud.domain), username, and the app password. Optionally, specify a conversation ID. - Test: In Developer Tools -> Services, call
notify.nextcloud_talk_your_integration_namewith a test message.
Example Automation: Motion Detection with Snapshot
Receive a camera snapshot in Nextcloud Talk when motion is detected:
automation:
  - alias: "Send motion snapshot to Nextcloud Talk"
    trigger:
      - platform: state
        entity_id: binary_sensor.motion_sensor_front_door
        to: "on"
    action:
      - service: camera.snapshot
        data:
          entity_id: camera.front_door_camera
          filename: "/config/www/snapshots/front_door_{{ now().strftime('%Y%m%d_%H%M%S') }}.jpg"
      - delay: "00:00:01" # Allow file to save
      - service: notify.nextcloud_talk_your_integration_name
        data:
          message: "Motion detected at the front door!"
          data:
            image: "/config/www/snapshots/front_door_{{ now().strftime('%Y%m%d_%H%M%S') }}.jpg"
          target: "your_nextcloud_talk_conversation_id"
    mode: single
Note: The /config/www/snapshots/ path makes the image accessible via your Home Assistant URL, enabling the Nextcloud Talk integration to process and send it.
Advanced Integration: Nextcloud Files for Data Archiving
Nextcloud can serve as a robust, private storage solution for your smart home data, ideal for long-term archiving of sensor logs, security footage, or reports.
Uploading Files to Nextcloud Files
While Home Assistant lacks a direct "upload to Nextcloud Files" integration, you can achieve this using shell_command to execute curl, interacting with Nextcloud's WebDAV API or a custom upload endpoint on your Nextcloud server.
Recommendation: Use shell_command with curl.
This method is practical for uploading files from Home Assistant (e.g., camera recordings, generated reports). You'll typically use curl to send a file to your Nextcloud instance, possibly via a custom PHP script on your Nextcloud server that handles authentication (e.g., a shared secret) and places the file into the correct user's directory. After uploading, remember to trigger Nextcloud's file scan (occ files:scan) to make the new files visible in the Nextcloud interface.
# Example shell_command for file upload (requires curl on HA host)
shell_command:
  upload_recording_to_nextcloud: "curl -F 'file=@/config/www/recordings/{{ filename }}' -F 'secret=YOUR_SHARED_SECRET' https://your.nextcloud.domain/custom_upload_script.php"
Note: The custom_upload_script.php on your Nextcloud server would handle receiving the file and placing it in the correct Nextcloud user's directory. Ensure proper security measures (e.g., IP whitelisting, shared secrets) for this script.
Example Automation: Archiving Daily Data
Archive sensor data, like daily temperature logs, to Nextcloud:
automation:
  - alias: "Archive daily temperature data to Nextcloud"
    trigger:
      - platform: time
        at: "23:59:00"
    action:
      - service: shell_command.upload_recording_to_nextcloud
        data:
          filename: "temperature_log_{{ now().strftime('%Y%m%d') }}.txt" # Assume this file is generated first
    mode: single
This example assumes you'd generate the log file within Home Assistant's configuration directory before calling the upload command.
Best Practices for a Reliable Ecosystem
- Security First: Always use HTTPS for both Home Assistant and Nextcloud. Use strong, unique passwords and consider app passwords. Secure custom upload scripts (e.g., with shared secrets, IP whitelisting).
- Data Management: Plan for data retention to prevent storage overload.
- Performance: Avoid excessively frequent uploads. Batch data or upload only critical events.
- Error Handling: Utilize Home Assistant's logs and Nextcloud's server logs for troubleshooting.
- Nextcloud File Scanning: If uploading directly to the data directory, remember to run
occ files:scanon your Nextcloud server to refresh file indexes. This can be automated via cron or a triggeredshell_command.
Conclusion
Integrating Home Assistant with Nextcloud offers a powerful path to a private, secure, and intelligent smart home. From self-hosted notifications to robust data archiving, this combination empowers you to control your digital life. Embrace this synergy for an ecosystem that respects your privacy while providing unparalleled automation capabilities.

NGC 224
Author bio: DIY Smart Home Creator
