Beyond Traditional Protocols: Integrating RTL-SDR & `rtl_433` with Home Assistant for Diverse RF Devices

NGC 224
DIY Smart Home Creator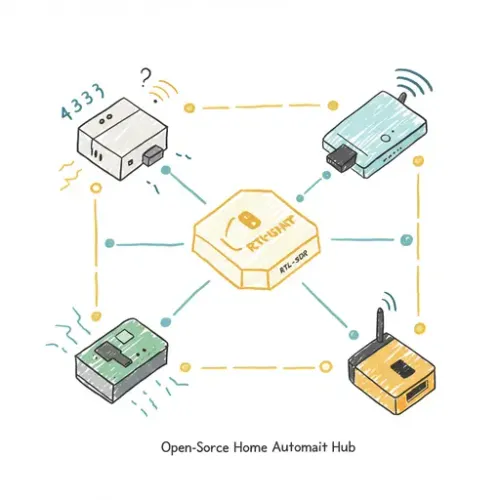
Introduction: Expanding Your Smart Home Horizons with RF
While Zigbee and Z-Wave dominate the smart home landscape, a vast ecosystem of inexpensive 433 MHz and 315 MHz RF devices remains largely untapped by traditional hubs. These include a myriad of door/window sensors, motion detectors, temperature/humidity sensors, and even smoke alarms, often sold as standalone alarm system components or budget-friendly smart gadgets. The problem? Most require proprietary bridges or lack direct integration with open-source platforms like Home Assistant, leading to vendor lock-in, data silos, and unnecessary cost.
This guide offers a powerful, open-source solution: combining an RTL-SDR (Software-Defined Radio) dongle with the rtl_433 decoding software and MQTT to seamlessly integrate these diverse RF devices into your Home Assistant setup. This approach empowers tech enthusiasts, DIY makers, and practical homeowners to build a more comprehensive, cost-efficient, and truly customized smart home monitoring system, extending far beyond the limitations of off-the-shelf smart home protocols.
Step-by-Step Setup: Bringing RF Devices into Home Assistant
1. Prerequisites: Hardware, OS, and Software Foundation
To begin, ensure you have the following:
- RTL-SDR Dongle: An RTL2832U-based dongle (e.g., NooElec NESDR Mini 2+, Adafruit RTL-SDR) is ideal. Make sure it comes with an antenna.
- Linux Host: A Raspberry Pi (3B+ or newer recommended for performance), or any Debian/Ubuntu-based system that can run Home Assistant (e.g., Home Assistant OS, supervised, or a separate server).
- MQTT Broker: Mosquitto is highly recommended and usually runs as an add-on in Home Assistant OS or can be installed separately.
- Basic Linux Skills: Familiarity with the command line is essential for installation and configuration.
1.1. Install System Dependencies and RTL-SDR Drivers
Connect your RTL-SDR dongle to your Linux host. Then, open a terminal and run the following commands:
sudo apt update
sudo apt upgrade -y
sudo apt install -y build-essential cmake libusb-1.0-0-dev rtl-sdr git
1.2. Blacklist DVB-T Modules
The operating system might try to use your RTL-SDR dongle as a DVB-T (digital TV) receiver, preventing rtl_433 from accessing it. Blacklist these modules:
echo 'blacklist dvb_usb_rtl28xxu' | sudo tee /etc/modprobe.d/blacklist-rtl.conf
echo 'blacklist rtl2832' | sudo tee -a /etc/modprobe.d/blacklist-rtl.conf
echo 'blacklist rtl2830' | sudo tee -a /etc/modprobe.d/blacklist-rtl.conf
sudo reboot
After rebooting, verify the dongle is recognized by rtl_sdr:
rtl_test
You should see output indicating a found device, with no DVB-T related errors.
2. Installing and Configuring rtl_433
While rtl_433 might be available via apt, compiling from source often provides the latest version with the most decoders. This is crucial for recognizing new or obscure RF devices.
2.1. Compile rtl_433 from Source
git clone https://github.com/merbanan/rtl_433.git
cd rtl_433
mkdir build
cd build
cmake ..
make
sudo make install
2.2. Test rtl_433 and Identify Devices
Run rtl_433 to listen for devices. Have an RF sensor (e.g., a door sensor) trigger nearby.
rtl_433 -f 433.92M -A -R 0
-f 433.92M sets the frequency (common for EU/Asia; use 315M for North America if your sensors operate there). -A shows all supported protocols. -R 0 disables all default decoders initially, so you can see raw messages or specific decoders. Look for JSON output when your device triggers. Note down the device ID and protocol number.
If you see raw data but no decoded JSON, you might need to enable specific decoders. Try running with just -f 433.92M and observe. If you identify a protocol (e.g., “Blyss” or “EV1527”), you can then specify it: rtl_433 -f 433.92M -R (replace <protocol_number> with the number corresponding to your device).
2.3. Configure rtl_433 for MQTT and Home Assistant Discovery
rtl_433 can publish directly to MQTT, and importantly, it supports Home Assistant's MQTT Discovery protocol, which makes integration effortless. Create a configuration file:
sudo mkdir -p /etc/rtl_433
sudo nano /etc/rtl_433/rtl_433.conf
Paste the following, adjusting frequency and MQTT details:
# Global settings
frequency 433.92M

# Output to MQTT in Home Assistant Discovery format
output mqtt://<MQTT_BROKER_IP>:1883,user=<MQTT_USERNAME>,pass=<MQTT_PASSWORD>,event=rtl_433/<your_instance_name>/devices[/<model>][/<id>],retained=0,disc=rtl_433/<your_instance_name>/discovery,discovery_topic=homeassistant

# Optional: Specify decoders if you only want to listen for certain types
# Example: only enable protocol 170 (Acurite 606TX temperature sensor)
# protocol 170

# Optional: Filter by device ID for specific devices, e.g., if you have multiple of the same type
# filter <model>:<id>

# Example: filter by model and ID for a specific door sensor
# filter EV1527:123456
Replace <MQTT_BROKER_IP>, <MQTT_USERNAME>, <MQTT_PASSWORD>, and <your_instance_name> (e.g., main_receiver) with your MQTT broker's credentials and a unique identifier for this `rtl_433` instance.
3. Setting up rtl_433 as a System Service
For persistent, background operation, create a systemd service for rtl_433:
sudo nano /etc/systemd/system/rtl_433.service
Paste the following:
[Unit]
Description=RTL_433 Daemon
After=network.target

[Service]
ExecStart=/usr/local/bin/rtl_433 -c /etc/rtl_433/rtl_433.conf
Restart=always
User=nobody
Group=nogroup
Nice=-5

[Install]
WantedBy=multi-user.target
Enable and start the service:
sudo systemctl enable rtl_433.service
sudo systemctl start rtl_433.service
sudo systemctl status rtl_433.service
Verify it's running without errors. You can check logs with journalctl -u rtl_433.service -f.
4. Integrating with Home Assistant via MQTT Discovery
With rtl_433 publishing in Home Assistant Discovery format, integration is largely automatic. Ensure your Home Assistant instance has the MQTT integration set up and pointing to the same MQTT broker.
- In Home Assistant, go to Settings > Devices & Services > Integrations.
- If you don't have it, click ADD INTEGRATION and search for "MQTT". Configure it with your MQTT broker details.
- Once
rtl_433is running and your RF devices trigger, Home Assistant should automatically discover them as new entities under the MQTT integration. You'll find them under the MQTT integration's Devices list.
For devices that rtl_433 decodes but don't get auto-discovered (less common with recent versions and correct config), you can manually define them in configuration.yaml:
# configuration.yaml
mqtt:
  sensor:
    - name: "Garage Door Sensor"
      state_topic: "rtl_433/main_receiver/devices/EV1527/123456/contact"
      value_template: >
        {% if value == 'OPEN' %}on{% else %}off{% endif %}
      device_class: door

  binary_sensor:
    - name: "Living Room Motion Sensor"
      state_topic: "rtl_433/main_receiver/devices/PT2260/7890AB/motion"
      value_template: >
        {% if value == 'DETECTED' %}on{% else %}off{% endif %}
      device_class: motion
This approach requires you to know the exact MQTT topic and payload structure. Always use an MQTT Explorer tool (like MQTT Explorer desktop app) to inspect messages if manually configuring.
Troubleshooting Section
-
RTL-SDR Dongle Not Found or No Devices Detected by
rtl_433:- Run
rtl_test. If it fails, ensure the DVB-T modules are blacklisted correctly and you've rebooted. - Check USB connection. Try a different USB port or power supply if on a Raspberry Pi.
- Verify
rtl_433.servicelogs:journalctl -u rtl_433.service -f. Look for errors related to the device. - Ensure the antenna is properly connected.
- Verify the frequency in
rtl_433.confmatches your devices. - Trigger your RF device multiple times directly next to the RTL-SDR antenna.
- Run
-
No Data Showing in Home Assistant:
- MQTT Broker Check: Use MQTT Explorer to connect to your broker. Do you see messages on topics like
rtl_433/main_receiver/devices/#orhomeassistant/#? If not,rtl_433isn't publishing correctly. rtl_433MQTT Configuration: Double-check the MQTT URL, username, and password in/etc/rtl_433/rtl_433.conf.- Home Assistant MQTT Integration: Ensure the MQTT integration in Home Assistant is configured and connected. Check its logs (Settings > Devices & Services > MQTT > 3 dots > System options > Enable debugging, then check Home Assistant logs).
- Device Triggering: Are your physical RF devices actually transmitting? Check their batteries.
- Discovery Topic: Ensure
discovery_topic=homeassistantis correctly specified in yourrtl_433.conf.
- MQTT Broker Check: Use MQTT Explorer to connect to your broker. Do you see messages on topics like
-
Intermittent Readings or Poor Range:
- Antenna Placement: RF signals are sensitive. Try moving the RTL-SDR dongle to a central location, away from interference (e.g., metal, large electronics). Experiment with antenna orientation.
- Interference: Other wireless devices (Wi-Fi, cordless phones, microwaves) can cause interference.
- Sensor Batteries: Low batteries in the RF sensors often lead to weak, unreliable signals.
- Dongle Quality: Cheaper dongles can have poorer reception. An external antenna can sometimes help.
Advanced Configuration and Optimization
Filtering, Renaming, and Templating
rtl_433 can sometimes pick up signals from neighboring houses or other unwanted devices. You can filter these out:
rtl_433.conffiltering: Use thefilter <model>:<id>directive to only decode specific devices.- Home Assistant Templates: For finer control over displayed names or values, use template sensors in Home Assistant. This is also useful for converting raw values (e.g., voltage) into meaningful states (e.g., battery low/ok).
# configuration.yaml
# Example template sensor to refine an rtl_433 battery voltage reading
template:
  - sensor:
      - name: "Basement Sensor Battery Status"
        unique_id: basement_sensor_battery_status
        state: >
          {% if states('sensor.rtl_433_temperature_humidity_123456_battery_V') | float(0) < 2.5 %}
            low
          {% else %}
            ok
          {% endif %}
        device_class: battery
Multiple RTL-SDR Dongles
If you need to monitor different frequencies simultaneously (e.g., 433 MHz and 315 MHz) or require wider coverage, you can run multiple RTL-SDR dongles. Each dongle needs a unique serial number (which can often be set with `rtl_eeprom`). Then, run separate `rtl_433` instances, each with its own `rtl_433.conf` and `systemd` service, specifying the device with -d <device_index_or_serial>:
# Example rtl_433_315mhz.service
[Service]
ExecStart=/usr/local/bin/rtl_433 -d 00000001 -c /etc/rtl_433/rtl_433_315mhz.conf
# ... rest of service config
Security Considerations
rtl_433 is a receiver and does not transmit, so it cannot be used to “hack” devices in the same way an RF transmitter could. However, the data it collects is pushed to your MQTT broker.
- Secure MQTT: Always use TLS/SSL and strong authentication for your MQTT broker. Never expose an unsecured MQTT port to the internet.
- Network Isolation: If possible, run
rtl_433on a separate, hardened host or within a container/VM with restricted network access.
Performance Optimization
rtl_433 is generally lightweight. For very busy RF environments or if running on an underpowered host, ensure:
- Dedicated Host: Consider running
rtl_433on a dedicated Raspberry Pi Zero W or similar if your Home Assistant instance is heavily loaded. - Filtering: Use
protocolandfilterdirectives inrtl_433.confto reduce the amount of data processed and sent over MQTT.
Real-World Example: Smartening a “Dumb” Smoke Detector
Many inexpensive smoke detectors operate on 433 MHz, emitting a distinct signal when they detect smoke or have a low battery. While this doesn't replace certified smart smoke detectors, it adds a valuable layer of remote notification to a standard, non-networked device.
Let's assume you have a 433 MHz smoke detector (e.g., based on the EV1527 protocol) that rtl_433 identifies as EV1527:123456 and sends a smoke attribute with “1” when triggered. When idle, no smoke attribute is present.
# Home Assistant Automation (automations.yaml)

- alias: 'Notify on Basement Smoke Detector Alert'
  description: 'Sends a notification if the basement smoke detector triggers via RTL-SDR.'
  trigger:
    - platform: mqtt
      topic: 'rtl_433/main_receiver/devices/EV1527/123456'
      payload: '{\"smoke\":1}' # Adjust payload based on actual rtl_433 output for smoke detection
      value_template: "{{ value_json.smoke | int(0) == 1 }}" # Ensure it's explicitly smoke == 1
  condition: []
  action:
    - service: notify.mobile_app_your_phone
      data:
        title: "🔥 EMERGENCY: Smoke Detected! 🔥"
        message: "The basement smoke detector has reported smoke. Check immediately!"
        data:
          priority: high
          ttl: 0 # Notification doesn't expire
    - service: persistent_notification.create
      data:
        title: "Smoke Detector Alert"
        message: "Smoke detected in the basement (via RTL-SDR)."
        notification_id: "basement_smoke_alert"
  mode: single

- alias: 'Notify on Basement Smoke Detector Low Battery'
  description: 'Sends a notification if the basement smoke detector reports low battery via RTL-SDR.'
  trigger:
    - platform: mqtt
      topic: 'rtl_433/main_receiver/devices/EV1527/123456'
      payload: '{\"battery_ok\":0}' # Adjust payload based on actual rtl_433 output for low battery
      value_template: "{{ value_json.battery_ok | int(1) == 0 }}"
  condition:
    - condition: time
      after: '08:00:00'
      before: '22:00:00'
  action:
    - service: notify.mobile_app_your_phone
      data:
        title: "⚠️ Low Battery: Basement Smoke Detector"
        message: "The basement smoke detector battery is low. Please replace it soon."
    - service: persistent_notification.create
      data:
        title: "Low Battery Alert"
        message: "Basement smoke detector battery is low (via RTL-SDR)."
        notification_id: "basement_smoke_low_batt"
  mode: single
This automation provides immediate alerts directly to your phone and Home Assistant interface, leveraging a device that would otherwise be isolated from your smart home ecosystem.
Best Practices and Wrap-up
-
Device Identification and Documentation: Keep a spreadsheet or note of all your RF devices, their unique IDs (as reported by
rtl_433), battery types, and locations. This is invaluable for troubleshooting and maintenance. -
Optimal Antenna Placement: RF range and reliability are heavily dependent on antenna quality and placement. Experiment with location (higher is often better) and orientation to find the sweet spot, especially for devices further away or through walls.
-
Proactive Battery Management: Many RF sensors are battery-powered. Implement Home Assistant automations to notify you when battery levels are low, well before they fail. If
rtl_433reports battery voltage or status, use it! -
Secure Your MQTT Broker: This cannot be stressed enough. Unsecured MQTT is an open door to your smart home data.
-
Leverage the Community: The
rtl_433project on GitHub and Home Assistant forums are excellent resources. If a device isn't being decoded, chances are someone else has encountered it, or you might even contribute a new decoder yourself. -
Backup Your Configuration: Regularly back up your
rtl_433.confand Home Assistantconfiguration.yamlfiles to prevent data loss in case of system failure.
By following this guide, you've not only integrated a new class of devices into Home Assistant but also gained a deeper understanding of software-defined radio and MQTT. This powerful combination opens up endless possibilities for monitoring and automating your environment using affordable, readily available RF hardware, pushing the boundaries of what your smart home can achieve.
NGC 224
Author bio: DIY Smart Home Creator
