Bridging Industrial Precision: RS485 Modbus Sensors to Home Assistant via ESPHome Gateway

NGC 224
DIY Smart Home Creator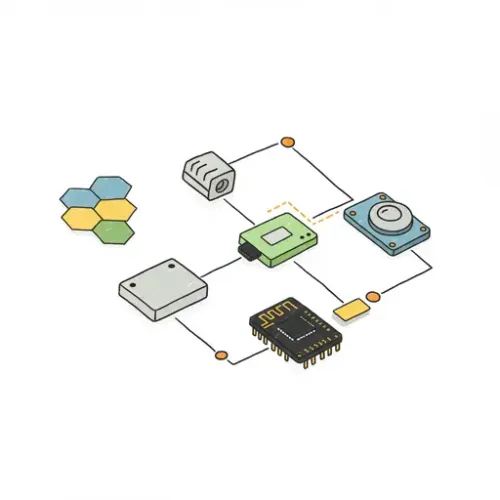
Intro: Unlocking Industrial Precision for Your Smart Home
Many common smart home sensors offer convenience but often fall short in terms of accuracy, reliability, or range, especially for demanding environmental monitoring or larger, more critical spaces. Industrial-grade sensors, frequently communicating via robust protocols like Modbus RTU over RS485, provide superior precision, durability, and long-distance communication capabilities. However, integrating these into a consumer-friendly platform like Home Assistant can seem like a daunting challenge.
For tech enthusiasts, DIY makers, and professionals, leveraging industrial sensors means unlocking hyper-accurate data for critical automations — imagine precise HVAC control based on real-time CO2 levels in a workshop, or granular temperature/humidity tracking in a server room. This guide will demystify the process, showing you how to build a reliable and cost-effective gateway using an ESP32 running ESPHome to seamlessly bridge your RS485 Modbus sensors to Home Assistant.
Step-by-Step Setup: From Hardware to Home Assistant
This section details the necessary hardware, wiring, and ESPHome configuration to bring your Modbus RTU sensors online in Home Assistant.
1. Gather Your Hardware
You will need these core components:
- ESP32 Development Board: Any ESP32 board (e.g., NodeMCU ESP32, ESP32-WROOM-32 dev kit) to run ESPHome as your Modbus gateway.
- RS485 Transceiver Module: A module like the MAX485 or SP3485 breakout board. This converts the ESP32's UART signals to RS485 differential signals.
- RS485 Modbus RTU Sensor: Your chosen industrial sensor (e.g., a high-precision CO2, temperature/humidity, or PM2.5 sensor). Crucially, it must support Modbus RTU.
- Connecting Wires: Jumper wires for short connections, and ideally shielded twisted pair cable for longer RS485 runs.
- Power Supply: A suitable 5V power supply for the ESP32. Your sensor may require a separate 12V or 24V supply.

2. Wiring the RS485 Transceiver to ESP32
Connect the MAX485 (or similar) module to your ESP32. Standard pinouts are:
- VCC: Connect to ESP32 3.3V or 5V (check MAX485 module specs).
- GND: Connect to ESP32 GND.
- RO (Receiver Output): Connect to an ESP32 RX pin (e.g., GPIO16).
- DI (Driver Input): Connect to an ESP32 TX pin (e.g., GPIO17).
- RE (Receiver Enable) / DE (Driver Enable): Tie these two pins together and connect them to an ESP32 GPIO pin (e.g., GPIO21). ESPHome will control this pin for data direction.
Then, connect your RS485 sensor to the A and B terminals of the MAX485 module. Ensure correct polarity (A to A, B to B). Some sensors might label these D+/D- or RX+/RX-.
       ESP32          MAX485 Module          RS485 Sensor
    ------------      ---------------      ----------------
    |    5V    |-----|      VCC      |
    |    GND   |-----|      GND      |
    |    GPIO16|-----|      RO       |
    |    GPIO17|-----|      DI       |
    |    GPIO21|-----| RE & DE (tied)|
    |          |      ---------------
    |          |                     |----| A / D+ |
    |          |                     |----| B / D- |
    ------------                           ------------

3. ESPHome Configuration for Modbus RTU
Use the following YAML snippet as a template for your ESPHome configuration. Replace placeholders and adapt register details based on your sensor's datasheet.
esphome:
  name: modbus_gateway
  platform: ESP32
  board: nodemcu-32s

wifi:
  ssid: "YOUR_SSID"
  password: "YOUR_PASSWORD"
web_server: {}

uart:
  id: modbus_uart
  tx_pin: GPIO17
  rx_pin: GPIO16
  baud_rate: 9600 # IMPORTANT: Match your sensor's baud rate
  parity: NONE
  stop_bits: 1
  data_bits: 8

modbus:
  id: modbus_controller
  uart_id: modbus_uart
  update_interval: 15s # How often to poll the sensor

sensor:
  - platform: modbus_controller
    modbus_controller_id: modbus_controller
    name: "Workshop CO2"
    address: 1 # Sensor's Modbus slave ID
    register_type: HOLDING # Or INPUT, per datasheet
    register: 0x0001 # Specific register for CO2 value
    value_type: UWORD # Unsigned 16-bit word
    # The lambda is CRITICAL for scaling raw sensor data
    lambda: 'return x;' # Adjust: e.g., 'return x / 10.0;' if sensor value is * 10
    unit_of_measurement: "ppm"
    device_class: carbon_dioxide
    state_class: measurement
    filters:
      - calibrate_linear:
          - 0 -> 0 # Add calibration points if needed
          - 1000 -> 1000
Key configuration points:
uart: Set TX/RX pins, and critically, matchbaud_rate,parity,stop_bits, anddata_bitsto your Modbus sensor's exact specifications.modbus: Links to your defined UART bus.update_intervalcontrols polling frequency.sensor: Defines the sensor entity.address: The Modbus slave ID of your sensor.register_type: Consult your sensor's datasheet (e.g.,HOLDING,INPUT).register: The specific memory address on the Modbus device where your data is stored.value_type: How raw bytes are interpreted (e.g.,UWORD,SIGNED_WORD,FLOAT).lambda: Essential for converting raw sensor data to meaningful units.
After configuration, compile and upload the firmware to your ESP32 using the ESPHome dashboard or CLI.
4. Home Assistant Integration
Once your ESP32 is running ESPHome, Home Assistant should automatically discover the new device via the ESPHome integration. Navigate to Settings > Devices & Services > Integrations. You should see a new "ESPHome" device (e.g., "modbus_gateway"). Configure it if prompted, and your sensor(s) will appear as entities.

Troubleshooting Section: Common Modbus Hiccups
Modbus can be finicky. Here are common issues and their resolutions:
1. No Communication / Sensor Not Showing Up
- Wiring Check: Verify all connections, especially RS485 A/B polarity. Swapping A and B is common. Ensure RE/DE are tied and connected.
- Power Supply: Confirm adequate and stable power for both the ESP32 and the RS485 sensor.
- ESPHome Logs: Your primary diagnostic tool. Look for "Modbus communication failed", "CRC error", "Illegal data address", or "Illegal function" messages in the ESPHome dashboard logs.
- UART Settings:
Baud Rate,Parity,Stop Bits, andData BitsMUST EXACTLY match the sensor's specifications. - Modbus Address/ID: Ensure the
addressin your ESPHome YAML matches the sensor's configured slave ID. - Register Type/Address: An "Illegal data address" usually means you're trying to read from a non-existent register or using the wrong
register_type. Consult your sensor's datasheet meticulously. - Termination Resistors: For longer bus lengths or multiple devices, 120-ohm termination resistors at both ends of the RS485 bus can prevent signal reflections.
2. Incorrect Sensor Readings
lambdaFunction: Most common cause. If your sensor sends raw integers that need scaling (e.g.,255for25.5°C), yourlambdamust correctly convert it (e.g.,return x / 10.0;).value_type: Incorrectly interpreting aSIGNED_WORDas aUWORD(or vice versa) can lead to wildly wrong numbers.- Byte Order (Endianness): Less common, but some Modbus devices use different byte orders. Check your sensor's datasheet. ESPHome handles standard big-endian by default.
Advanced Configuration & Optimization
1. Multiple Sensors on a Single Bus
RS485 is a multi-drop bus, allowing multiple sensors to connect to a single ESP32 gateway. Each sensor MUST have a unique Modbus slave ID (address). Wiring is daisy-chained: A to A, B to B across all devices.
# ... (uart and modbus component config remains the same)

sensor:
  # Sensor 1 (e.g., CO2 at address 1)
  - platform: modbus_controller
    modbus_controller_id: modbus_controller
    name: "Living Room CO2"
    address: 1
    register_type: HOLDING
    register: 0x0001
    value_type: UWORD
    lambda: 'return x;'
    unit_of_measurement: "ppm"

  # Sensor 2 (e.g., Temp/Hum at address 2)
  - platform: modbus_controller
    modbus_controller_id: modbus_controller
    name: "Living Room Temperature"
    address: 2
    register_type: HOLDING
    register: 0x0100
    value_type: SIGNED_WORD
    lambda: 'return x / 10.0;'
    unit_of_measurement: "°C"
Adjust update_interval and potentially add a timeout in the modbus component if you have many sensors or slow devices.
2. Writing to Modbus Registers (Actuators)
Modbus isn't just for reading; you can write to registers to control devices (e.g., fan speed, relay state). Use modbus_controller.write_register or modbus_controller.write_coil actions in ESPHome automations.
# ... (modbus component config)

switch:
  - platform: template
    name: "Industrial Fan Control"
    turn_on_action:
      - modbus_controller.write_register:
          id: modbus_controller
          address: 3 # Modbus address of the relay module
          register: 0x0001 # Holding register for control
          value: 1 # Set bit 0 to 1 (ON)
    turn_off_action:
      - modbus_controller.write_register:
          id: modbus_controller
          address: 3
          register: 0x0001
          value: 0 # Set bit 0 to 0 (OFF)
Always consult your device's datasheet for correct function codes, register addresses, and values to write.
Real-World Example: Smart Ventilation Based on CO2
Let's automate a ventilation system using our industrial CO2 sensor and a smart plug-controlled fan. This Home Assistant automation will trigger the fan when CO2 levels exceed a threshold and turn it off when they drop.
# In Home Assistant automations.yaml or UI
alias: "Automate Workshop Ventilation based on CO2"
description: "Turn on fan when CO2 is high, turn off when low."
trigger:
  - platform: numeric_state
    entity_id: sensor.workshop_co2
    above: "800" # ppm threshold to turn on fan
    for:
      minutes: 5 # Avoid flickering
    id: "co2_high"
  - platform: numeric_state
    entity_id: sensor.workshop_co2
    below: "600" # ppm threshold to turn off fan
    for:
      minutes: 5 # Avoid flickering
    id: "co2_low"
condition: []
action:
  - choose:
      - conditions:
          - condition: trigger
            id: "co2_high"
        sequence:
          - service: switch.turn_on
            target:
              entity_id: switch.workshop_fan_smart_plug # Replace with your fan's entity_id
          - service: persistent_notification.create
            data:
              message: "Workshop CO2 high ({{ states('sensor.workshop_co2') }} ppm). Fan turned ON."
              title: "CO2 Alert"
      - conditions:
          - condition: trigger
            id: "co2_low"
        sequence:
          - service: switch.turn_off
            target:
              entity_id: switch.workshop_fan_smart_plug
          - service: persistent_notification.create
            data:
              message: "Workshop CO2 normal ({{ states('sensor.workshop_co2') }} ppm). Fan turned OFF."
              title: "CO2 Alert"
mode: single
This provides a robust and responsive system for maintaining air quality, driven by precise data.
Best Practices & Wrap-up
Integrating industrial sensors elevates your smart home. Ensure stability, security, and scalability with these best practices:
- Cabling for RS485: Use shielded twisted pair cables for RS485, especially over distances (up to 1200 meters), to minimize interference and ensure signal integrity.
- Power Supply Stability: Provide stable, isolated power supplies for both your ESP32 gateway and industrial sensors. Noise causes intermittent communication errors.
- Modbus Addressing: Plan unique Modbus slave IDs carefully for multiple devices on a bus to avoid conflicts.
- Sensor Calibration: Incorporate sensor calibration values (if provided) into your ESPHome
lambdafunctions or Home Assistant template sensors for maximum accuracy. - Physical Security: Restrict physical access to your ESP32 gateway and sensors, particularly in sensitive environments.
- ESPHome Updates & Backups: Regularly update ESPHome firmware and back up your YAML configurations (e.g., in Git) for easy restoration and replication.
- Monitoring: Utilize Home Assistant's history graphs and utility meters to monitor sensor performance and identify anomalies or drift over time.
By following these guidelines, you can build a highly reliable and precise environmental monitoring system, leveraging the best of industrial hardware with the flexibility and automation power of Home Assistant.
NGC 224
Author bio: DIY Smart Home Creator
