Mastering Z-Wave Device Management: Integrating Z-Wave JS UI with Home Assistant

NGC 224
DIY Smart Home Creator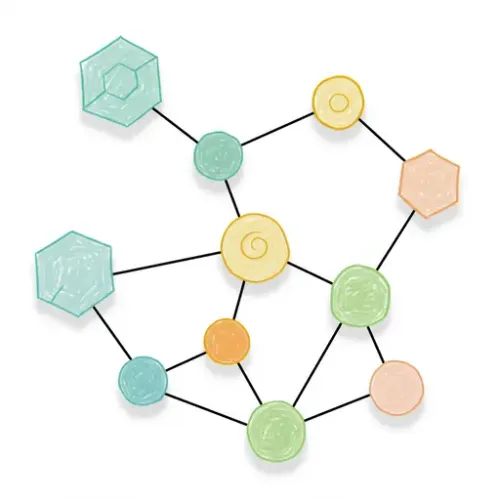
Mastering Z-Wave Device Management: Integrating Z-Wave JS UI with Home Assistant
Z-Wave is a popular wireless protocol for smart home devices, known for its reliability, mesh networking capabilities, and low power consumption. While Home Assistant offers built-in integrations for Z-Wave, the community-driven Z-Wave JS UI (formerly Z-Wave JS 2 MQTT) add-on provides a more feature-rich and user-friendly interface for managing your Z-Wave network.
This guide will walk you through integrating Z-Wave JS UI with Home Assistant, covering essential setup steps, device pairing techniques, and best practices to ensure a stable and responsive smart home environment.
Why Choose Z-Wave JS UI?
Z-Wave JS UI acts as a bridge between your Z-Wave controller stick and Home Assistant. It runs the Z-Wave JS driver, providing a WebSocket server that Home Assistant connects to. It also includes a comprehensive web-based user interface (the "UI" part) that offers significant advantages:
- Advanced Network Management: Easily view network topology, device status, and communication paths.
- Simplified Device Configuration: Access and modify device parameters through a clear interface, often with parameter descriptions fetched automatically.
- Firmware Updates: Some devices support firmware updates directly through the UI.
- Healing & Diagnostics: Tools for healing the network (re-routing communication) and diagnosing issues.
- MQTT Gateway (Optional): While we'll focus on the WebSocket integration with Home Assistant, it also has MQTT capabilities for other systems.
Prerequisites
Before you begin, ensure you have the following:
- A running instance of Home Assistant (OS, Supervised, or Container).
- A compatible Z-Wave USB controller stick (e.g., Aeotec Z-Stick, Zooz S2 Stick).
- Physical access to the machine running Home Assistant to plug in the Z-Wave stick.
Setup: Installing and Configuring Z-Wave JS UI
The easiest way to install Z-Wave JS UI on Home Assistant OS or Supervised is via the Add-on Store.
Step 1: Install the Add-on
- Navigate to Settings -> Add-ons in Home Assistant.
- Click the Add-on Store button in the bottom right corner.
- Search for "Z-Wave JS UI" and select it.
- Click the Install button.
Step 2: Configure the Add-on
Once installed, you need to configure the add-on to communicate with your Z-Wave stick.
- Go to the Configuration tab of the Z-Wave JS UI add-on.
- Serial Port: Under the "Z-Wave" section, find the "Serial Port" setting. You need to enter the path to your Z-Wave stick's serial device. Click the dropdown to see available ports. Common paths look like
/dev/ttyACM0or/dev/serial/by-id/usb-XYZ. Using theby-idpath is recommended as it's more stable if you plug in other USB devices. - Network Key: This is CRITICAL for security. Z-Wave devices support encryption (S0, S2). You MUST generate and configure a unique network key. The add-on configuration page has fields for different security keys (S0 Legacy, S2 Authenticated, S2 Unauthenticated, S2 Access Control). Click the "Generate" button next to each S2 key and the S0 key. Copy these keys and store them somewhere safe, as you'll need them if you ever move to a new controller or software.
- WebSocket Port: Note the WebSocket port (default is 3000). Home Assistant will use this to communicate with the add-on.
- Review other settings like MQTT (can be disabled if only using Home Assistant), and logging levels.
- Click Save.
Step 3: Start the Add-on and Access the UI
- Go back to the Info tab of the Z-Wave JS UI add-on.
- Enable Start on boot and optionally Watchdog (recommended).
- Click the Start button.
- Wait a minute or two for the add-on to start and initialize the Z-Wave stick.
- Click Open Web UI. This will open the Z-Wave JS UI management interface in a new tab.
- Log in to the UI. The default credentials are
adminfor both username and password (CHANGE THIS IMMEDIATELY in the UI settings for security!).
Step 4: Configure Home Assistant Integration
Now, tell Home Assistant to use the running Z-Wave JS UI instance.
- In Home Assistant, go to Settings -> Devices & Services.
- Click Add Integration.
- Search for "Z-Wave JS".
- When prompted for the Z-Wave JS server address, enter the WebSocket URL for the add-on. If running on the same Home Assistant instance, this is typically
ws://a0d7b954-zwavejs2mqtt:3000(replacea0d7b954-zwavejs2mqttwith the add-on's internal hostname if different, or the IP address of your HA server if not using Hass.io add-ons). The default internal hostname for the add-on store version is usually correct. The port is the WebSocket port from Step 2 (default 3000). - Click Submit. Home Assistant should connect to the Z-Wave JS UI server and discover your controller.
- The integration is now set up. Home Assistant will start discovering devices already paired with your controller.
Device Integration Tips
With Z-Wave JS UI running and connected to Home Assistant, you can start adding devices.
- Pairing (Inclusion):
- In the Z-Wave JS UI web UI, go to the Control Panel.
- Click + Include Device.
- The UI will enter inclusion mode. Follow your device's instructions to put it into inclusion mode (usually pressing a button sequence on the device).
- Keep the device close to the controller or a powered Z-Wave device initially.
- If prompted for Security (S2/S0), choose the desired level. S2 is strongly recommended for compatible devices. You might need to enter a Device Specific Key (DSK) or QR code for S2 inclusion.
- Once included, the device will appear in the Z-Wave JS UI node list and automatically populate in Home Assistant.
- Excluding Devices:
- In the Z-Wave JS UI web UI, go to the Control Panel.
- Click - Exclude Device.
- The UI will enter exclusion mode. Follow your device's instructions to put it into exclusion mode. This works even if the device was originally paired with a different controller.
- Managing Device Parameters:
- In the Z-Wave JS UI web UI, navigate to the specific device in the node list.
- Go to the Configuration tab for that device.
- Here you can view and modify device-specific parameters (e.g., LED behavior, reporting intervals). Z-Wave JS UI often fetches parameter definitions automatically, making this much easier than looking up manuals.
- Healing the Network:
- If devices are having communication issues (slow response, missed commands), healing the network can help the controller discover better routes.
- In the Z-Wave JS UI web UI, go to the Control Panel.
- Click Heal Network. You can heal a single node or the entire network. Healing the entire network can take a long time depending on its size.
Best Practices for a Reliable Z-Wave Network
Building a robust Z-Wave network requires more than just pairing devices.
- Use a Strong Network Key: As mentioned earlier, always generate and use unique S0 and S2 network keys. This encrypts communication, preventing eavesdropping and unauthorized control.
- Place Your Controller Optimally: Position your Z-Wave stick centrally, if possible, and away from sources of interference (like Wi-Fi routers, microwaves). A USB extension cable can help move the stick away from the computer/server which can generate noise.
- Build a Strong Mesh Network: Z-Wave uses a mesh network, where powered devices (like switches and outlets) can act as repeaters for battery-powered devices. Start by including powered devices closest to the controller and work outwards. Ensure you have enough powered devices to create reliable paths throughout your home.
- Perform Regular Network Heals (Judiciously): While healing can improve routes, doing it too frequently or unnecessarily can sometimes cause issues. Perform a heal if you've added or removed several devices, or if you notice communication problems with specific nodes. Consider healing individual problematic nodes first.
- Manage Device Firmware: Check the Z-Wave JS UI and manufacturer websites for firmware updates for your devices. Updates can improve performance, fix bugs, or add new features. The Z-Wave JS UI can facilitate updates for some devices.
- Troubleshoot with the UI: The Z-Wave JS UI provides logs and network visualization that are invaluable for troubleshooting. If a device isn't responding, check its status in the UI, view the network graph to see its neighbors, and review the logs for errors.
- Use S2 Security When Possible: S2 (Security 2) is the latest and most secure Z-Wave security framework. Prioritize S2-compatible devices and include them using S2 for enhanced security and sometimes improved efficiency compared to S0.
Conclusion
Integrating Z-Wave JS UI with Home Assistant provides a powerful and flexible platform for managing your Z-Wave smart home. Its intuitive web interface simplifies tasks like device pairing, configuration, and network diagnostics that are more cumbersome with the basic integration. By following the setup steps, leveraging the UI's features, and adhering to best practices, you can build a highly reliable, secure, and responsive Z-Wave network that forms a solid foundation for your Home Assistant automations.
NGC 224
Author bio: DIY Smart Home Creator
