Mastering Zigbee and Wi-Fi Coexistence: Optimizing Your Home Assistant Network

NGC 224
DIY Smart Home Creator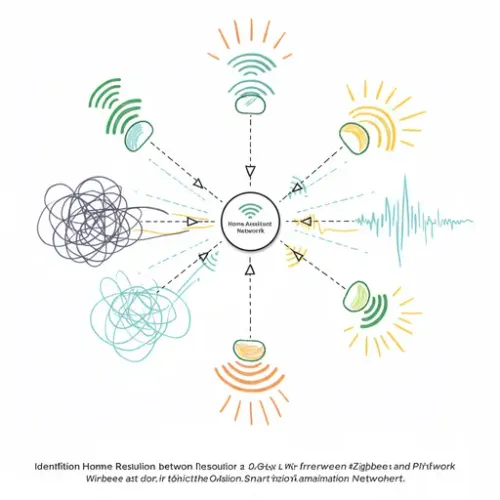
The Invisible Battle: When Zigbee and Wi-Fi Collide
If your Home Assistant dashboard periodically shows 'unavailable' Zigbee devices, or if smart lights randomly stop responding, you're likely experiencing a common, yet often overlooked, culprit: 2.4 GHz wireless interference. In the bustling radio frequency landscape of modern homes, Zigbee and Wi-Fi often find themselves competing for bandwidth, leading to unreliable smart home experiences. This isn't just an inconvenience; it can undermine the very foundation of your home automation, impacting everything from security sensors to energy management. This guide will walk you through understanding, identifying, and resolving Zigbee and Wi-Fi coexistence issues, ensuring your Home Assistant setup remains robust and responsive.
Understanding this conflict is crucial for anyone looking to build a stable and high-performing smart home. Both Zigbee and the widely used 2.4 GHz band of Wi-Fi operate in a similar frequency range. Wi-Fi channels 1, 6, and 11 are typically chosen as non-overlapping. Zigbee, however, uses 16 channels (11-26) across the same 2.4 GHz spectrum. When a Zigbee network operates on a channel that heavily overlaps with a dominant Wi-Fi channel, it leads to packet loss, dropped connections, and overall sluggish performance for your smart devices. Understanding this overlap is the first critical step to a stable smart home.
Step-by-Step Optimization: Achieving Wireless Harmony
1. Identify Your Current Wireless Landscape
Before making any changes, you need to know which channels your Wi-Fi and Zigbee networks are currently using.
For Wi-Fi Channels:
- Router Settings: Log into your Wi-Fi router's administration interface. Navigate to the wireless settings (often under 'Wireless', 'Wi-Fi', or 'Network'). You should find the channel selection for your 2.4 GHz band.
- Wi-Fi Analyzer Apps: Use a Wi-Fi analyzer app (e.g., WiFi Analyzer on Android, NetSpot on macOS/Windows, or various tools on Linux) on your phone or computer. These apps visualize Wi-Fi networks in your vicinity and show their channels, allowing you to identify interference from neighbors as well.
For Zigbee Channels:
- Zigbee Home Automation (ZHA): If you're using ZHA, the channel is typically configured during the initial setup of your Zigbee coordinator. You might find it in your Home Assistant's
under theconfiguration.yaml
section, or within the ZHA integration's device information in the UI (Settings -> Devices & Services -> ZHA -> Configure -> Zigbee Network). Look for an entry likezha:
.channel: 15 - Zigbee2MQTT (Z2M): For Zigbee2MQTT, the channel is defined in its
file. Access this file via the Home Assistant File Editor add-on or by SSHing into your system. Look for theconfiguration.yaml
section and theadvanced:
setting, e.g.,channel:
.channel: 11
2. Choose Optimal Channels
To maximize separation and minimize interference, observe the following guidelines:
- Wi-Fi Channel 1: The most effective non-overlapping Zigbee channels are 25 or 26.
- Wi-Fi Channel 6: This channel is problematic as it overlaps significantly with many Zigbee channels. If possible, avoid Wi-Fi channel 6 or consider Zigbee channels 11 or 26.
- Wi-Fi Channel 11: The most effective non-overlapping Zigbee channels are 11 or 15.
Generally, aim for Wi-Fi channels 1, 6, or 11 (non-overlapping Wi-Fi channels) and then pick a Zigbee channel as far away as possible from your chosen Wi-Fi channel. For example, if your Wi-Fi uses channel 1, select Zigbee channel 25 or 26. If your Wi-Fi uses channel 11, select Zigbee channel 11 or 15.
3. Changing Channels
Changing Wi-Fi Channels:
Log into your router's administration interface. Navigate to the 2.4 GHz wireless settings and manually select a new channel (1, 6, or 11). Apply the changes and restart your router. This will momentarily disconnect all Wi-Fi devices, so plan accordingly.
Changing Zigbee Channels (Requires Re-pairing Devices):
Warning: Changing your Zigbee channel typically requires all your Zigbee devices to be re-paired with your coordinator. This can be a time-consuming process for large networks. Only proceed if absolutely necessary and you're prepared for this task.
For ZHA:
You need to remove and re-add the ZHA integration. During the re-addition process, you'll be prompted to select a new channel. Alternatively, for some coordinators and versions, you might be able to specify the channel in your
configuration.yaml# Example ZHA configuration.yaml entry
zha:
usb_path: /dev/serial/by-id/usb-Nabu_Casa_SkyConnect_v1.0_XXXXXXX-if00-port0
channel: 25 # Set to your desired channel (e.g., 11, 15, 20, 25, 26)
After changing the channel, remove and re-pair all your Zigbee devices.
For Zigbee2MQTT:
Edit the
configuration.yaml/config/zigbee2mqttchannel:advanced:# Example Zigbee2MQTT configuration.yaml entry
homeassistant: true
permit_join: false
advanced:
channel: 25 # Set to your desired channel (e.g., 11, 15, 20, 25, 26)
pan_id: 0x1a61
ext_pan_id: 0x1a611a611a611a61
network_key: [...]
After restarting Z2M with the new channel, you will need to re-pair all your Zigbee devices to rebuild the network.
Troubleshooting Common Issues
- Devices Not Rejoining: If devices don't automatically rejoin after a channel change, they must be manually factory reset and re-paired. Ensure your coordinator is in pairing mode.
- Intermittent Connectivity After Channel Change: Even with optimized channels, other sources of interference can exist (e.g., microwaves, cordless phones, old baby monitors, faulty power supplies). Try relocating your Zigbee coordinator further away from potential interference sources.
- Wi-Fi Performance Degradation: If your Wi-Fi suffers after a channel change, your neighbors' Wi-Fi networks might be on the channel you just switched to. Use a Wi-Fi analyzer to find the least congested Wi-Fi channel in your environment, then choose your Zigbee channel accordingly.
- Zigbee Coordinator USB Interference: The USB 3.0 standard can generate RFI (Radio Frequency Interference) that impacts 2.4 GHz devices. If your Zigbee coordinator is a USB dongle, use a high-quality USB 2.0 extension cable (at least 1-2 meters long) to move it away from the host machine and other USB 3.0 ports.
Advanced Configuration / Optimization
- Strategic Repeater Placement: Not all Zigbee devices are equal. Mains-powered devices (e.g., smart plugs, light bulbs, wired switches) act as Zigbee routers, extending your mesh network. Strategically place these devices throughout your home, especially between the coordinator and distant battery-powered end devices, to improve signal strength and coverage.
- External Antennas: Many USB Zigbee coordinators (like ConBee II, SkyConnect, Sonoff Zigbee 3.0 Dongle Plus) can benefit from an external antenna. Upgrading to a higher-gain antenna can significantly improve range and signal stability, especially in larger homes or those with many obstacles.
- Dedicated Hardware & Placement: Position your Zigbee coordinator centrally in your home, away from large metal objects, power lines, and other wireless transmitting devices. A dedicated single-board computer (like a Raspberry Pi) running Home Assistant can host the coordinator in an optimal location, rather than buried in a server rack.
- Understanding Mesh Health (LQI/RSSI): Tools like Zigbee2MQTT's network map provide Link Quality Indicator (LQI) and Received Signal Strength Indicator (RSSI) values. Monitor these metrics to identify weak links in your mesh and guide repeater placement. Higher LQI and less negative RSSI values indicate better connections.
Real-World Example: A Densely Populated Smart Home
Consider a two-story home with numerous Wi-Fi devices (multiple access points, smart TVs, laptops) and a growing Home Assistant Zigbee network controlling lights, sensors, and thermostats. Initially, the homeowner configured their main Wi-Fi APs to use channels 1 and 6, while the Zigbee network defaulted to channel 11. This created a significant overlap between the Wi-Fi AP on channel 6 and the Zigbee network, leading to unresponsive motion sensors and delayed light automations in half of the house.
Following the optimization steps, the homeowner used a Wi-Fi analyzer to identify the least congested Wi-Fi channels in their neighborhood, settling on Wi-Fi channel 1 for the ground floor AP and channel 11 for the upstairs AP. Then, they reconfigured their Zigbee network (using Zigbee2MQTT) to channel 25. This move ensured maximum separation from both Wi-Fi networks. They also strategically placed two mains-powered smart plugs in problem areas to act as repeaters. After the re-pairing process, the Zigbee network became rock-solid, with instant response times and no more 'unavailable' entities, proving the power of proper channel planning.
Best Practices and Wrap-up
- Document Your Channels: Keep a record of your chosen Wi-Fi and Zigbee channels. This is invaluable for troubleshooting or when adding new wireless equipment.
- Regular Monitoring: Periodically review your Wi-Fi environment with an analyzer tool. New neighbor networks can introduce interference, requiring re-evaluation of your channel choices.
- Physical Placement: Always prioritize the physical location of your Zigbee coordinator. A few meters can make a significant difference. Use USB extension cables as necessary.
- Quality Hardware: Invest in reputable Zigbee coordinators (e.g., SkyConnect, Sonoff ZBDongle-E/P, ConBee II). Cheaper alternatives may have inferior antennas or firmware, leading to poorer performance regardless of channel optimization.
- Firmware Updates: Keep your Zigbee coordinator firmware, Home Assistant, and Zigbee2MQTT/ZHA up-to-date. These updates often include performance enhancements and bug fixes that improve network stability.
By diligently applying these strategies, you can transform a fragile smart home into a robust, reliable, and responsive Home Assistant ecosystem, free from the invisible battles of wireless interference.
NGC 224
Author bio: DIY Smart Home Creator
