Mastering Precise Room Presence: Integrating ESPresence with Home Assistant for Hyper-Local Automations

NGC 224
DIY Smart Home Creator
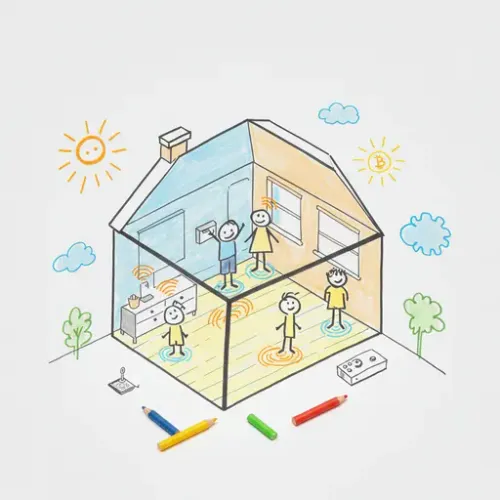
Imagine your smart home knowing not just that you're home, but precisely which room you're in. Lights turn on as you enter, music follows you, and climate adapts. This is achievable with ESPresence, an open-source project that transforms inexpensive ESP32 devices into highly accurate Bluetooth Low Energy (BLE) room presence detectors, seamlessly integrating with Home Assistant.
ESPresence provides granular, room-level accuracy and local processing, ensuring privacy and reliability. This guide walks you through setting up ESPresence, integrating it with Home Assistant, and leveraging its capabilities for truly intelligent, context-aware automations.
Why ESPresence? Hyper-Local Precision
Unlike Wi-Fi or GPS, ESPresence pinpoints location by detecting BLE beacons (phones, Tile trackers, smartwatches) and reporting their signal strength (RSSI) to Home Assistant. Key benefits:
- Room-Level Accuracy: Precise location within your home.
- Local & Private: Data processed locally via MQTT.
- Cost-Effective: Uses affordable ESP32/ESP8266 boards.
- Customizable: Built on ESPHome for flexible configuration.
Prerequisites
- Home Assistant: A running instance.
- MQTT Broker: Integrated with Home Assistant (e.g., Mosquitto add-on).
- ESPHome Add-on (Recommended): For simplified management.
- ESP32 Board(s): At least one ESP32 (recommended over ESP8266 for BLE).
- BLE Device(s) for Tracking: Smartphone (with BLE advertising), Tile, or other BLE tags.
Step-by-Step Setup
1. Flashing Your ESP32
- Connect your ESP32 to your computer.
- Go to the ESPresence install page.
- Select your board type and click "Install ESPresence." Follow prompts to flash firmware.
2. Initial Wi-Fi and MQTT Configuration
After flashing, the ESP32 creates a temporary Wi-Fi AP ("ESPresence-XXXXXX").
- Connect your device to this AP. A config portal opens (or navigate to
192.168.4.1). - Enter your home Wi-Fi SSID/password, MQTT broker IP (e.g.,
192.168.1.50), port (1883), and MQTT credentials. - Click "Save." ESP32 restarts and connects.
Tip: Assign a static IP to your ESPresence nodes via your router.
3. Home Assistant Integration
ESPresence uses MQTT discovery. Home Assistant automatically detects your ESPresence node and any detected BLE devices, creating device_tracker entities (e.g., device_tracker.your_phone_ble_tracker_espresence_room).
Check Settings > Devices & Services > Devices, filter by "MQTT" to see them.
4. Calibrating RSSI
RSSI (Received Signal Strength Indicator) determines if a device is "in" a room. Lower (more negative) values mean weaker signals.
- Identify BLE Device IDs: Use "nRF Connect" (Android/iOS) to find your device's MAC address/UUID.
- Monitor RSSI: In Home Assistant (Developer Tools > States), observe your
device_trackerentities while moving your tracked device. - Set Thresholds: Each ESPresence node has a
room_threshold. Devices with RSSI stronger than this are "in" the room. A starting point is around -70 to -80 dBm, adjusted based on your environment. Configure this via the ESPresence web UI or by re-flashing with a custom configuration. - Test: Move between rooms, ensuring correct detection.
# Example ESPresence config snippet for a node (via ESPHome)
espresence:
  room_threshold: -75 # Default RSSI threshold for this node
  scan_interval: 5s
  report_interval: 10s
Best Practices & Troubleshooting
- Dedicated Trackers: Use Tile or key finders for reliability; phone BLE can be inconsistent.
- Node Placement: Place nodes strategically in each room, avoiding obstructions. Ensure slight coverage overlap between rooms for smooth transitions.
- Multiple Devices/Person: Combine multiple trackers for one person using Home Assistant's
personhelper. - Unstable Presence (Flickering): Adjust
room_threshold. Add more nodes if needed. Use Home Assistant's Room Presence helper (HACS) to aggregate multiple trackers for stability. - MQTT Issues: Verify broker IP, port, credentials. Check broker logs.
- iOS MAC Randomization: Be aware iOS devices can randomize MACs. Consider AirTags (limited beacon function) or dedicated BLE tags for consistent tracking.
Advanced Use Cases
1. Robust Room Occupancy Binary Sensors
Create a stable binary_sensor for room occupancy using Home Assistant templates or the Room Presence helper.
# configuration.yaml snippet for a template binary_sensor
binary_sensor:
  - platform: template
    sensors:
      living_room_occupied:
        friendly_name: "Living Room Occupied"
        device_class: occupancy
        value_template: >
          {% if is_state('device_tracker.person_a_phone_espresence_living_room', 'home') or
                is_state('device_tracker.person_b_tile_espresence_living_room', 'home') %}
            true
          {% else %}
            false
          {% endif %}
        delay_off:
          minutes: 2 # Prevents flickering
2. Dynamic Lighting
# automations.yaml snippet
- alias: 'Living Room Lights On on Entry'
  trigger:
    platform: state
    entity_id: binary_sensor.living_room_occupied
    to: 'on'
  condition: "{{ is_state('sun.sun', 'below_horizon') }}"
  action:
    - service: light.turn_on
      target:
        entity_id: light.living_room_main
      data:
        brightness_pct: 70
3. Following Media Playback
Pause music in one room and resume in another as you move. This involves more complex scripting, watching room_presence changes and controlling media players (e.g., Sonos, Google Cast).
Logic: Person moves from Kitchen to Living Room -> Pause Kitchen player, resume Living Room player.
4. Optimized Climate Control
Adjust thermostats or smart vents only in occupied rooms, saving energy.
# automations.yaml snippet
- alias: 'Activate Bedroom AC when Occupied'
  trigger:
    platform: state
    entity_id: binary_sensor.bedroom_occupied
    to: 'on'
  condition: "{{ states('climate.bedroom_thermostat') == 'off' and now().month in (6,7,8) }}"
  action:
    - service: climate.set_hvac_mode
      target:
        entity_id: climate.bedroom_thermostat
      data:
        hvac_mode: cool
    - service: climate.set_temperature
      target:
        entity_id: climate.bedroom_thermostat
      data:
        temperature: 23
Managing a Scalable & Secure System
- Network: Robust Wi-Fi and consider a dedicated IoT VLAN for security.
- ESPHome Integration: Manage ESPresence nodes via the ESPHome add-on for centralized configuration and updates.
- MQTT Security: Always use authentication for your MQTT broker.
- Updates: Keep ESPresence firmware and Home Assistant updated.
- Redundancy: For critical areas, consider multiple ESPresence nodes.
Conclusion
ESPresence offers a powerful, privacy-centric solution for granular room-level presence detection in Home Assistant. By following this guide, you can create truly responsive and intuitive automations that react to your exact location, leading to a smarter, more efficient, and personalized smart home experience.

NGC 224
Author bio: DIY Smart Home Creator
