Mastering DIY Weather Station Integration: Hyper-Local Data with ESPHome, MQTT, and Home Assistant Templates

NGC 224
DIY Smart Home Creator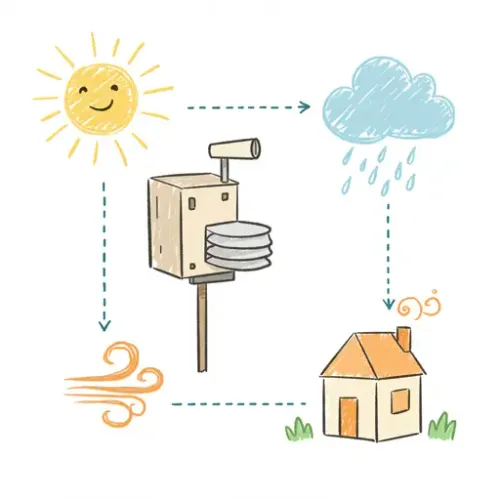
Mastering DIY Weather Station Integration: Hyper-Local Data with ESPHome, MQTT, and Home Assistant Templates
Tired of inaccurate weather forecasts? A DIY weather station integrated with Home Assistant provides hyper-local, real-time data, empowering precise smart home automations. This guide shows you how to build an ESPHome-based station, publish data via MQTT, and parse it into actionable sensors using Home Assistant's templating engine.
Gain control over metrics like temperature, humidity, pressure, and rainfall for a truly intelligent, responsive smart home.
1. The DIY Weather Station Hardware & ESPHome Configuration
An ESP32 or ESP8266 board running ESPHome forms the core. For essential metrics, a BME280 sensor provides temperature, humidity, and pressure. Other common sensors include tipping bucket rain gauges and anemometers.
Here’s a minimal ESPHome YAML to read BME280 data and publish it as a JSON payload to an MQTT topic:
# Your Wi-Fi credentials
wifi:
  ssid: "YOUR_SSID"
  password: "YOUR_PASSWORD"

# MQTT broker settings
mqtt:
  broker: 192.168.1.50 # Replace with your HA/MQTT Broker IP
  port: 1883
  username: mqtt_user # If your broker requires authentication
  password: mqtt_password

# SNTP for accurate timestamps
sntp:
  id: sntp_time
  servers: ["0.pool.ntp.org", "1.pool.ntp.org"]

# I2C bus for BME280
i2c:
  - id: bus_a
    sda: GPIO21 # Adjust pins for your ESP board
    scl: GPIO22

# BME280 sensor definition
sensor:
  - platform: bme280
    temperature:
      name: "Outdoor Temperature"
      unit_of_measurement: "°C"
      id: outdoor_temperature
    pressure:
      name: "Outdoor Pressure"
      unit_of_measurement: "hPa"
      id: outdoor_pressure
    humidity:
      name: "Outdoor Humidity"
      unit_of_measurement: "%"
      id: outdoor_humidity
    address: 0x76 # Or 0x77, check your sensor
    i2c_id: bus_a
    update_interval: 60s

# Publish all sensor data as JSON to MQTT topic 'weather_station/data' every minute
interval:
  - interval: 60s
    then:
      - mqtt.publish:
          topic: "weather_station/data"
          payload: !lambda |-
            return print("{}".format(json::build_json([&](json::JsonObject root) {
              root["temperature"] = id(outdoor_temperature).state;
              root["humidity"] = id(outdoor_humidity).state;
              root["pressure"] = id(outdoor_pressure).state;
              root["timestamp"] = id(sntp_time).now().strftime("%Y-%m-%d %H:%M:%S");
            })));
Compile and upload this firmware to your ESP32/ESP8266. Ensure your MQTT broker (e.g., Mosquitto add-on) is running and accessible.
2. Home Assistant MQTT Integration: Parsing Data with Templates
Home Assistant needs to subscribe to your MQTT topic and extract individual sensor values from the JSON payload. Add the following to your configuration.yaml:
# configuration.yaml

mqtt:
  sensor:
    - name: "Outdoor Temperature"
      state_topic: "weather_station/data"
      unit_of_measurement: "°C"
      value_template: "{{ value_json.temperature | round(1) }}"
      device_class: temperature
      state_class: measurement
      unique_id: outdoor_temp_ws_diy

    - name: "Outdoor Humidity"
      state_topic: "weather_station/data"
      unit_of_measurement: "%"
      value_template: "{{ value_json.humidity | round(1) }}"
      device_class: humidity
      state_class: measurement
      unique_id: outdoor_humidity_ws_diy

    - name: "Outdoor Pressure"
      state_topic: "weather_station/data"
      unit_of_measurement: "hPa"
      value_template: "{{ value_json.pressure | round(1) }}"
      device_class: pressure
      state_class: measurement
      unique_id: outdoor_pressure_ws_diy

    - name: "Weather Station Last Update"
      state_topic: "weather_station/data"
      value_template: "{{ value_json.timestamp }}"
      device_class: timestamp
      unique_id: weather_station_last_update_ws_diy
Restart Home Assistant. You will now have entities like sensor.outdoor_temperature displaying real-time data from your station. The value_template: "{{ value_json.temperature }}" extracts the data from the JSON payload, while device_class and state_class ensure proper display and historical recording.
3. Troubleshooting Common Issues
- MQTT Connection Refused: Verify broker IP, port, username, and password in ESPHome YAML. Use MQTT Explorer to confirm if the ESP device is publishing.
- HA Sensors Unavailable: Ensure
state_topicin HA matches ESPHome exactly. Check HA logs for template errors. Confirm JSON payload structure via MQTT Explorer. - ESPHome Wi-Fi Issues: Double-check SSID/password, signal strength.
4. Advanced Configuration & Optimization
4.1. Adding More Sensors (e.g., Rain Gauge)
For a tipping bucket rain gauge, add a pulse_counter to ESPHome YAML:
# ESPHome YAML snippet
sensor:
  # ... other sensors ...
  - platform: pulse_counter
    pin: GPIO12 # Rain gauge input
    name: "Rainfall Ticks"
    id: rainfall_ticks
    filters:
      - multiply: 0.2794 # Calibrate mm/tick for your sensor
    unit_of_measurement: "mm"
    update_interval: 60s
    total_type: total
# ... add 'root["rainfall_mm"] = id(rainfall_ticks).state;' to the MQTT lambda ...
Then, add the corresponding MQTT sensor in Home Assistant:
# Home Assistant configuration.yaml snippet
mqtt:
  sensor:
    # ... existing sensors ...
    - name: "Outdoor Rainfall"
      state_topic: "weather_station/data"
      unit_of_measurement: "mm"
      value_template: "{{ value_json.rainfall_mm | default(0) | round(2) }}"
      state_class: total_increasing
      unique_id: outdoor_rainfall_ws_diy
(Remember to calibrate the multiply factor for your specific rain gauge.)
4.2. Battery Optimization (Deep Sleep)
For remote, battery-powered stations, implement ESPHome Deep Sleep. The device wakes up periodically, takes readings, publishes, then sleeps again. This dramatically conserves power but reduces update frequency.
4.3. Data Retention & Visualization
For in-depth analysis of historical weather data, consider integrating InfluxDB and Grafana. This offers efficient long-term storage and powerful, customizable dashboards beyond Home Assistant's default recorder.
5. Real-World Example: Smart Garden Irrigation
Use your hyper-local data for intelligent automations, like preventing irrigation if it has recently rained:
# automation.yaml

- alias: "Intelligent Garden Irrigation"
  description: "Water plants if soil is dry and no recent local rain"
  trigger:
    - platform: time
      at: "06:00:00" # Check every morning
    - platform: numeric_state
      entity_id: sensor.soil_moisture_sensor_1
      below: 30 # Trigger if soil moisture drops below 30%
  condition:
    - condition: numeric_state
      entity_id: sensor.outdoor_temperature
      above: 5 # Only water if above freezing
    - condition: numeric_state
      entity_id: sensor.outdoor_rainfall # Assumes a sensor for 24h rainfall
      below: 2 # Only water if less than 2mm rain in the last 24h
  action:
    - service: switch.turn_on
      target:
        entity_id: switch.garden_irrigation_pump
    - delay: "00:15:00"
    - service: switch.turn_off
      target:
        entity_id: switch.garden_irrigation_pump
    - service: persistent_notification.create
      data:
        title: "Garden Irrigation"
        message: "Irrigation activated due to conditions ({{ states('sensor.soil_moisture_sensor_1') }}%, {{ states('sensor.outdoor_rainfall') }}mm rain)."
(Note: A sensor.outdoor_rainfall representing 24-hour accumulation would likely be a Home Assistant Utility Meter or Template Sensor based on your raw rainfall data.)
6. Best Practices & Wrap-up
- Security: Always use TLS/SSL for MQTT and strong passwords. Consider VLANs for IoT devices.
- Maintenance: Protect outdoor sensors from elements. Periodically calibrate readings against reliable sources.
- Data Integrity: Ensure MQTT payloads include timestamps. Use
default()filters in templates to prevent errors if JSON keys are occasionally missing. - ESPHome Updates: Keep your ESPHome firmware updated for bug fixes and features.
By mastering DIY weather station integration, you've gained precise environmental insights and unlocked new possibilities for advanced, local Home Assistant automations.
NGC 224
Author bio: DIY Smart Home Creator
