Stop Hardcoding: Centralizing Secrets Management in Home Assistant for Security and Scalability

NGC 224
DIY Smart Home Creator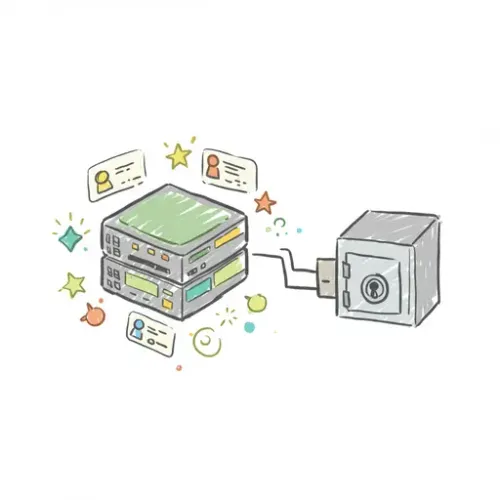
Introduction: The Peril of Hardcoded Credentials
As your Home Assistant (HA) setup grows in complexity and capability, integrating with more services and devices, you invariably encounter sensitive information: API keys for weather services, login credentials for cameras, MQTT broker passwords, or tokens for cloud integrations. A common pitfall for many, especially those new to HA, is to hardcode these sensitive details directly into their primary configuration files (e.g., configuration.yaml or other integration-specific YAMLs).
This practice introduces significant security vulnerabilities and severe maintenance headaches. Hardcoded secrets are easily exposed if you share your configuration, commit it to a public GitHub repository, or even if your HA instance is compromised. Furthermore, managing different credentials for development vs. production environments, or across multiple HA instances, becomes a nightmare. This guide will walk you through implementing robust secrets management in Home Assistant, leveraging secrets.yaml and environment variables for a more secure, scalable, and maintainable smart home.
Step-by-Step Setup: Implementing secrets.yaml
The primary and most straightforward method for managing secrets in Home Assistant is through the secrets.yaml file. This file stores your sensitive data and allows you to reference it in your main configuration without exposing the raw values.
1. Create the secrets.yaml File
Navigate to your Home Assistant configuration directory (e.g., /config). Create a new file named secrets.yaml in the root of this directory. It should be at the same level as your configuration.yaml.
# /config/secrets.yaml

# Example for a weather API key
weather_api_key: 'your_super_secret_weather_api_key_12345'

# Example for an MQTT broker password
mqtt_broker_password: 'secure_mqtt_pass'

# Example for a camera username/password
camera_username: 'admin_cam'
camera_password: 'my_camera_secure_password'

# Example for a sensitive URL
webhook_receive_url: 'https://hooks.example.com/receive/abcdef123'
Note: Ensure proper YAML formatting. Each secret should be a key-value pair.
2. Reference Secrets in Your Configuration Files
Now, wherever you need to use a sensitive value in your configuration.yaml or other included YAML files, you'll use the !secret tag followed by the name of the secret you defined in secrets.yaml.
# /config/configuration.yaml

# Example using the weather API key
weather:
  - platform: openweathermap
    api_key: !secret weather_api_key
    monitored_conditions:
      - temperature
      - humidity

# Example using MQTT credentials
mqtt:
  broker: 192.168.1.100
  username: 'homeassistant'
  password: !secret mqtt_broker_password

# Example for a camera integration
camera:
  - platform: generic
    name: Front Door Camera
    still_image_url: "http://192.168.1.50/snapshot.jpg"
    username: !secret camera_username
    password: !secret camera_password

# Example for a webhook automation
automation:
  - alias: 'Receive External Webhook'
    trigger:
      platform: webhook
      webhook_id: !secret webhook_receive_url_id # Note: webhook_id is usually a simple ID, not a full URL
    action:
      - service: persistent_notification.create
        data:
          message: 'Webhook received!'
Important: Home Assistant automatically loads secrets.yaml if it exists in the configuration directory. You do not need to explicitly include it in configuration.yaml.
Screenshot Placeholder: A file explorer view showing `secrets.yaml` alongside `configuration.yaml` in the `/config` directory.
Troubleshooting Common Secrets Issues
Even with a straightforward mechanism, issues can arise. Here are common problems and their solutions:
!secret <secret_name>not found:- Spelling Mismatch: Double-check that the secret name in
configuration.yaml(e.g.,!secret weather_api_key) exactly matches the key insecrets.yaml(weather_api_key: '...'). YAML is case-sensitive. - Incorrect File Path: Ensure
secrets.yamlis in the root of your Home Assistant configuration directory (usually/config), next toconfiguration.yaml. - Indentation Errors: YAML is highly sensitive to indentation. Ensure
secrets.yamlkeys are at the root level (no leading spaces). - Missing Restart: After modifying
secrets.yaml, you must restart Home Assistant for changes to take effect.
- Spelling Mismatch: Double-check that the secret name in
- Secrets Visible in Configuration UI: Certain integrations might, by design, expose configuration parameters in the UI. While the raw secret won't be in your YAML, the UI might show a placeholder or even the value if it's retrieved. This is integration-specific and less common for direct
!secretusage. - Permissions Issues: Ensure the Home Assistant user has read permissions on
secrets.yaml. Incorrect file permissions can prevent HA from reading the file.
Always check your Home Assistant logs (Developer Tools > Logs) for errors related to !secret directives after making changes.
Advanced Configuration: Environment Variables for Critical Credentials
While secrets.yaml is excellent for most scenarios, there are cases where even more robust segregation or dynamic provisioning of secrets is required, especially in containerized deployments (Docker, Kubernetes) or CI/CD pipelines. This is where environment variables come into play.
When to use Environment Variables:
- Docker/Container Deployments: Easily inject secrets without modifying files inside the container image.
- CI/CD Pipelines: Pass sensitive tokens from your CI/CD system's secret store directly to your HA container.
- Highly Sensitive, Core Credentials: For secrets that should never even touch the filesystem, or vary significantly between development/staging/production environments.
How Home Assistant uses Environment Variables
Home Assistant can directly read environment variables. For example, if you define an environment variable named HA_API_TOKEN, you can access it within your configuration using a template or sometimes directly by specific integrations.
Example: Setting Environment Variables in Docker Compose
If you run Home Assistant in Docker, you can pass environment variables directly in your docker-compose.yaml file.
# /path/to/your/homeassistant/docker-compose.yaml

version: '3'
services:
  homeassistant:
    container_name: homeassistant
    image: ghcr.io/home-assistant/home-assistant:stable
    volumes:
      - ./config:/config
      - /etc/localtime:/etc/localtime:ro
    restart: unless-stopped
    privileged: true
    network_mode: host
    environment:
      - TZ=America/New_York
      - MY_CRITICAL_API_KEY=another_top_secret_key_123 # This is the environment variable
      - ANOTHER_ENV_SECRET=${EXTERNAL_ENV_VAR_FROM_HOST} # Reference host environment var
You can then reference MY_CRITICAL_API_KEY within your Home Assistant configuration using templating, for example, in an automation:
# In configuration.yaml or an automation file

automation:
  - alias: 'Send Critical Alert via External Service'
    trigger:
      platform: state
      entity_id: binary_sensor.security_breach
      to: 'on'
    action:
      - service: rest_command.send_external_alert
        data_template:
          url: "https://api.example.com/alert"
          payload: "status=breach&token={{ os.environ.get('MY_CRITICAL_API_KEY') }}"
Note the use of {{ os.environ.get('MY_CRITICAL_API_KEY') }} to access the environment variable within a Jinja2 template. This is a powerful method for truly externalizing sensitive data.
Screenshot Placeholder: A section of a `docker-compose.yaml` file highlighting the `environment` section.
Real-World Example: Securing a Telegram Notification Service
Let's illustrate securing an integration like Telegram notifications, which requires an API token (Bot Token) and a chat ID. Initially, you might hardcode these:
# BAD PRACTICE - DON'T DO THIS!

notify:
  - name: telegram_notifications
    platform: telegram
    chat_id: 123456789
    api_key: '123456:AAEGjgh435gfdgGfdfg-SDFgfdgdfg_FGDFg'
The Secure Way with secrets.yaml
First, add your Telegram credentials to secrets.yaml:
# /config/secrets.yaml

telegram_chat_id: 123456789
telegram_bot_token: '123456:AAEGjgh435gfdgGfdfg-SDFgfdgdfg_FGDFg'
Then, reference them in your configuration.yaml:
# /config/configuration.yaml

notify:
  - name: telegram_notifications
    platform: telegram
    chat_id: !secret telegram_chat_id
    api_key: !secret telegram_bot_token
This approach keeps your primary configuration clean and secure. If you need to change the token, you only modify secrets.yaml.
Even Better: Critical Token as Environment Variable (for advanced deployments)
For the most critical tokens, like the Telegram Bot Token which is essentially your bot's identity, you might push it to an environment variable in a Docker deployment.
# /path/to/your/homeassistant/docker-compose.yaml

version: '3'
services:
  homeassistant:
    # ... other configurations ...
    environment:
      - TELEGRAM_BOT_TOKEN='123456:AAEGjgh435gfdgGfdfg-SDFgfdgdfg_FGDFg'
Then, in configuration.yaml, you would use a template (note: not all integrations support templates directly for their core configuration, but it's possible in automations or custom components):
# This is more complex and depends on integration support.
# Typically, integrations expect !secret. For a truly env-var-only token,
# you might need a RESTful command or custom script triggered by HA.
# For Telegram, !secret is the recommended and practical approach.

# However, if an integration allowed it, it might look like this (conceptual):
# notify:
#   - name: telegram_notifications_env
#     platform: telegram
#     chat_id: !secret telegram_chat_id
#     api_key: "{{ os.environ.get('TELEGRAM_BOT_TOKEN') }}" # If integration supports templated API key
For `notify` integrations specifically, `!secret` is usually the most practical and secure method for the API key. The environment variable method is more suitable for general-purpose tokens used in `shell_command`, `rest_command`, or custom Python scripts invoked by HA.
Best Practices and Wrap-up
Adopting a strong secrets management strategy is not just about security; it's about building a maintainable and scalable Home Assistant environment.
- Never Commit
secrets.yamlto Public Repositories: Addsecrets.yamlto your.gitignorefile if you're using Git for version control. This is paramount to prevent accidental exposure. - Secure File Permissions: Ensure
secrets.yamlhas restrictive file permissions, ideally readable only by the Home Assistant user. - Encrypt Your Backups: If your backups include
secrets.yaml, ensure the backup itself is encrypted, especially if stored off-site. Home Assistant's built-in full backups are good, but always consider external encryption for sensitive data. - Regular Audits: Periodically review your
secrets.yamland configuration files to ensure no sensitive data has crept into the main config and that old, unused secrets are removed. - Categorize Secrets: Use descriptive names in
secrets.yamlto quickly identify what each secret is for. Group related secrets for clarity. - Prioritize Environment Variables for Critical Deployments: For production-grade or highly sensitive scenarios, especially those involving CI/CD or multiple deployment targets, environment variables offer superior isolation and flexibility.
By following these practices, you transform your Home Assistant setup from a collection of scripts into a robust, secure, and professional-grade smart home ecosystem. Say goodbye to hardcoded credentials and hello to peace of mind!
NGC 224
Author bio: DIY Smart Home Creator
