Boost Your Smart Home: Integrating Local Weather Stations with Home Assistant for Precision Control

NGC 224
DIY Smart Home Creator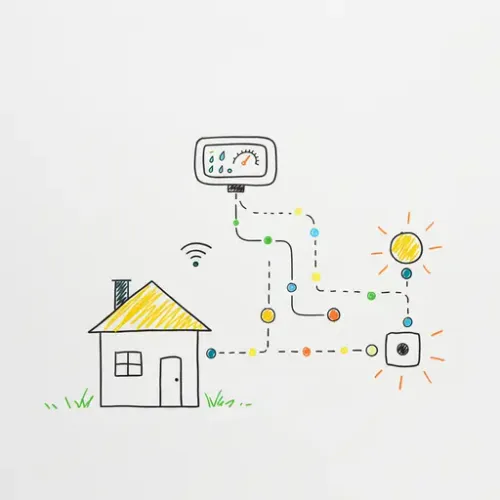
Intro: Why Generic Weather Forecasts Aren't Enough
For many Home Assistant users, relying solely on public weather services for automations can be a source of frustration. While convenient, integrations like OpenWeatherMap or AccuWeather provide regional forecasts that often fail to capture the nuances of your immediate environment. Microclimates, localized showers, wind tunneling around your home, or even a sudden drop in temperature in your specific garden plot are critical details missed by broad-stroke data. This imprecision can lead to suboptimal automations – watering when it just rained in your yard, leaving windows open during an unexpected localized gust, or mismanaging HVAC based on a distant city's temperature.
The solution lies in integrating a local weather station directly with Home Assistant. By capturing real-time, hyper-local data from your backyard, you gain unparalleled accuracy for your smart home. This guide will walk you through integrating a popular local weather station, the Ecowitt Gateway, using MQTT – a robust and flexible method that unlocks precise, actionable insights for your most critical automations.
Step-by-Step Setup: Ecowitt Gateway with Home Assistant via MQTT
For this guide, we'll focus on the Ecowitt Gateway (e.g., GW1000, GW1100, GW2000) due to its cost-effectiveness and versatile data output options, particularly its support for custom server communication via HTTP or MQTT. MQTT offers superior reliability and integration flexibility with Home Assistant.
1. Configure Your Ecowitt Gateway for Custom MQTT
First, you need to configure your Ecowitt Gateway to push data to your Home Assistant's MQTT broker. This is typically done through the WS View Plus app (available on iOS/Android).
Connect to the Gateway's Wi-Fi: Power on your Ecowitt Gateway. Using the WS View Plus app, add the device and connect it to your home Wi-Fi network.
Navigate to Custom Server Settings: In the app, once connected to your gateway, find 'More' -> 'Network' -> 'Customized'.
Enable MQTT and Input Details:
Set Type to 'MQTT'.
Server IP/Hostname: Enter the IP address or hostname of your Home Assistant instance running the MQTT broker (e.g.,
192.168.1.100).Port: Typically
1883for unencrypted MQTT.Client ID: A unique identifier, e.g.,
ecowitt_gateway.Username/Password: If your MQTT broker requires authentication, enter them here.
Topic: This is crucial. A common practice is to use something like
ecowitt/your_station_id/statusorecowitt/GW1000/telemetry. Make note of this topic, as you'll need it for Home Assistant configuration.Payload Type: 'JSON' (this is usually the default and recommended).
Interval: Set to your desired update frequency (e.g.,
30seconds). Be mindful of network traffic and database size for very frequent updates.
Screenshot Placeholder: (Imagine a screenshot of the WS View Plus app's Customized settings for MQTT, showing server IP, port, topic, etc.)
Save Settings: Apply the settings. Your Ecowitt gateway should now start publishing data to your MQTT broker.
2. Configure Home Assistant to Receive MQTT Data
Assuming you have the Mosquitto MQTT broker add-on installed and configured in Home Assistant, you'll now define MQTT sensors in your configuration.yaml to parse the data from your Ecowitt gateway.
Edit your configuration.yaml:
# configuration.yaml

mqtt:
  sensor:
    # Outdoor Temperature
    - name: "Outdoor Temperature"
      state_topic: "ecowitt/GW1000/telemetry"
      unit_of_measurement: "°C"
      value_template: "{{ value_json.tempout }}"
      device_class: "temperature"
      state_class: "measurement"

    # Outdoor Humidity
    - name: "Outdoor Humidity"
      state_topic: "ecowitt/GW1000/telemetry"
      unit_of_measurement: "%"
      value_template: "{{ value_json.humidityout }}"
      device_class: "humidity"
      state_class: "measurement"

    # Daily Rain
    - name: "Daily Rain"
      state_topic: "ecowitt/GW1000/telemetry"
      unit_of_measurement: "mm"
      value_template: "{{ value_json.dailyrain }}"
      device_class: "precipitation"
      state_class: "total_increasing"

    # Wind Speed
    - name: "Wind Speed"
      state_topic: "ecowitt/GW1000/telemetry"
      unit_of_measurement: "m/s"
      value_template: "{{ (value_json.windspeed | float * 0.44704) | round(2) }}" # Convert MPH to M/s if Ecowitt sends MPH
      device_class: "wind_speed"
      state_class: "measurement"

    # Solar Radiation (if your station has it)
    - name: "Solar Radiation"
      state_topic: "ecowitt/GW1000/telemetry"
      unit_of_measurement: "W/m²"
      value_template: "{{ value_json.solarradiation }}"
      state_class: "measurement"

    # Soil Moisture (for a specific channel, e.g., CH1)
    - name: "Garden Soil Moisture"
      state_topic: "ecowitt/GW1000/telemetry"
      unit_of_measurement: "%"
      value_template: "{{ value_json.soilmoisture1 }}"
      device_class: "humidity" # While not humidity, it's a percentage moisture
      state_class: "measurement"
Important: Adjust state_topic to match what you configured in the Ecowitt app. The value_json.KEY needs to correspond to the actual keys in the JSON payload sent by your Ecowitt gateway. You can inspect the MQTT topic using an MQTT client (like MQTT Explorer) to see the exact payload structure.
After saving, restart Home Assistant to apply the changes. You should now see new sensor entities (e.g., sensor.outdoor_temperature, sensor.daily_rain) populated with data.
Troubleshooting Section
Devices Not Showing Up/No Data:
MQTT Broker Logs: Check the logs of your Mosquitto MQTT broker add-on in Home Assistant. Look for connection attempts from the Ecowitt Gateway or any errors.
MQTT Explorer: Use an external MQTT client like MQTT Explorer (highly recommended) to connect to your Home Assistant's MQTT broker. Subscribe to
#(wildcard) to see all traffic. Confirm that your Ecowitt gateway is indeed publishing messages to the topic you configured, and verify the JSON payload structure.Network Connectivity: Ensure your Ecowitt Gateway has a stable connection to your Wi-Fi and can reach the Home Assistant IP address. Check for firewalls blocking port 1883.
YAML Syntax: Double-check your
configuration.yamlfor typos, incorrect indentation, or wrongvalue_json.KEYentries. Thevalue_templateis case-sensitive.Unit Conversion: If data appears, but units are wrong (e.g., MPH instead of M/s for wind), adjust the
value_templatewith appropriate math as shown in the wind speed example.
Inaccurate Data:
Sensor Placement: Ensure your weather station sensors are placed optimally according to Ecowitt's guidelines. For instance, rain gauges need clear sky, wind sensors need open air, and temperature sensors should be shaded.
Calibration: Some Ecowitt sensors allow calibration offsets in the WS View Plus app. Check if any sensors need fine-tuning against a known good reference.
Advanced Configuration / Optimization
1. Derived Sensors with Template Entities
Leverage Home Assistant's template sensors to create more useful entities from your raw weather data.
# configuration.yaml

# ... existing MQTT sensors ...

template:
  - sensor:
      # Feels Like Temperature (using a simple approximation)
      - name: "Outdoor Feels Like Temperature"
        unit_of_measurement: "°C"
        device_class: "temperature"
        state_class: "measurement"
        state: >-
          {% set temp = states('sensor.outdoor_temperature') | float(0) %}
          {% set wind = states('sensor.wind_speed') | float(0) %}
          {% if temp < 10 and wind > 5 %}
            {{ (temp - (wind * 0.7)) | round(1) }}
          {% else %}
            {{ temp | round(1) }}
          {% endif %}

      # Rain Intensity (e.g., mm/hr)
      - name: "Current Rain Intensity"
        unit_of_measurement: "mm/hr"
        device_class: "precipitation"
        state_class: "measurement"
        state: "{{ states('sensor.rainrate') | float(0) | round(2) }}" # Assuming 'rainrate' is available from Ecowitt
2. Integrating with Home Assistant's Weather Platform
For a unified weather entity that can be displayed beautifully in Lovelace dashboards, you can use the `weather` platform along with your custom sensors.
# configuration.yaml

# ... existing sensors and templates ...

weather:
  - platform: template
    name: "Local Weather Station"
    condition_template: "{% if states('sensor.current_rain_intensity') | float(0) > 0.1 %}rainy{% else %}clear-night{% endif %}" # Simple example, improve with more conditions
    temperature_template: "{{ states('sensor.outdoor_temperature') }}"
    humidity_template: "{{ states('sensor.outdoor_humidity') }}"
    pressure_template: "{{ states('sensor.baromrel') }}" # Assuming barometric pressure is available
    wind_speed_template: "{{ states('sensor.wind_speed') }}"
    wind_bearing_template: "{{ states('sensor.winddir') }}" # Assuming wind direction is available
    # Add other attributes as needed
This creates a new entity weather.local_weather_station which centralizes your data for display.
Real-World Example: Smart Irrigation & Window Alerts
Here are two powerful automations made possible by your hyper-local weather data:
1. Intelligent Garden Irrigation (YAML Automation)
Prevent overwatering and conserve water by only running your sprinklers when necessary.
# automations.yaml

- id: 'smart_garden_irrigation'
  alias: 'Smart Garden Irrigation'
  description: 'Automate watering based on local rain, soil moisture, and forecast'
  trigger:
    - platform: time
      at: "05:00:00" # Run check every morning at 5 AM
  condition:
    - condition: time
      weekday: # Only water on specific days, e.g., Tuesday, Friday
        - tue
        - fri
    - condition: numeric_state
      entity_id: sensor.daily_rain
      below: 5 # Only water if less than 5mm rain today
    - condition: numeric_state
      entity_id: sensor.garden_soil_moisture
      below: 40 # Only water if soil moisture is below 40%
    - condition: template
      value_template: "{{ states('sensor.outdoor_temperature') | float(0) > 5 }}" # Don't water if too cold
  action:
    - service: switch.turn_on # Replace with your actual sprinkler switch/valve entity
      target:
        entity_id: switch.sprinkler_zone_1
    - delay: "00:15:00" # Water for 15 minutes
    - service: switch.turn_off
      target:
        entity_id: switch.sprinkler_zone_1
    - service: system_log.write
      message: "Garden watered based on local weather conditions."
      level: info
2. Automated Window Closing Alerts (Node-RED Flow Placeholder)
Get proactive notifications to close windows when strong winds or rain are detected, protecting your home from damage.
Node-RED Flow Placeholder: (Imagine a Node-RED flow screenshot here)
Input Node: MQTT In node subscribed to
ecowitt/GW1000/telemetry.Function Node: Parses JSON payload and extracts
windspeedandrainrate.Switch Node 1 (Wind): Checks if
windspeed> 10 m/s.Switch Node 2 (Rain): Checks if
rainrate> 0.5 mm/hr.Delay Node: (Optional) Add a small delay (e.g., 5 minutes) to ensure sustained conditions before alerting.
Call Service Node: Calls
notify.mobile_app_yourphoneservice with a message like "Close windows! Strong winds detected ({{payload.windspeed}} m/s)!" or "Close windows! Rain has started ({{payload.rainrate}} mm/hr)!"Gate/RBE Node: (Optional) Rate limit alerts to prevent spamming.
Best Practices / Wrap-up
Sensor Placement: The accuracy of your local weather data hinges on proper sensor placement. Follow Ecowitt's recommendations for optimal exposure to wind, rain, and sunlight while minimizing interference from buildings or trees.
Data Storage and Visualization: For long-term analysis, consider integrating InfluxDB and Grafana with Home Assistant. This allows you to visualize trends, compare data over time, and fine-tune your automations based on historical weather patterns.
Network Security: If your Ecowitt Gateway is cloud-connected, ensure its firmware is up to date. If it's only pushing to local MQTT, consider isolating it on a separate VLAN or guest network to minimize potential security risks from IoT devices.
Regular Maintenance: Periodically clean your rain gauge funnel, ensure wind sensors spin freely, and check battery levels of remote sensors. Dirt, debris, or low batteries can lead to inaccurate readings.
Redundancy: For critical automations, consider having a fallback to a public weather service API (e.g., through Home Assistant's `PWS` integration if available for your location) in case your local station goes offline.
By integrating a local weather station, you elevate your Home Assistant automations from reactive to truly proactive and intelligent. You're no longer just responding to events, but anticipating them with data tailored precisely to your home's unique environment.
NGC 224
Author bio: DIY Smart Home Creator
