Building Advanced Custom Devices with ESPHome: Unlocking Specialized Automations in Home Assistant

NGC 224
DIY Smart Home Creator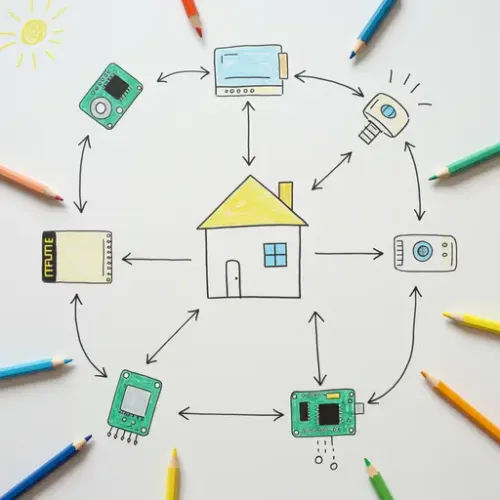
Unleash Customized Automation with Advanced ESPHome Devices
Off-the-shelf smart home gadgets often fall short for highly specialized needs or truly unique automation challenges. Perhaps you need a multi-point temperature monitor in your server rack, an automated pet feeder with custom logic, or a smart curtain opener for an unconventional window. This is where ESPHome excels, transforming inexpensive ESP32/ESP8266 microcontrollers into powerful, purpose-built smart devices seamlessly integrated with Home Assistant.
This guide moves beyond basic sensor integrations. We’ll delve into building advanced custom ESPHome devices, covering complex sensor integration, controlling multiple actuators, implementing custom C++ logic via lambdas, and ensuring robust, reliable operation within your Home Assistant ecosystem. Prepare to unleash your creativity and build solutions precisely tailored to your smart home's most challenging demands.
Step-by-Step: Setting Up Your Advanced ESPHome Device
For advanced devices, ESP32 modules are generally preferred due to their dual-core processing, more GPIO pins, and features like Bluetooth. For our initial example, we'll build a multi-functional environmental monitoring station that also controls a small fan or vent.
1. Choose Your Hardware & Install ESPHome
You'll need:
- An ESP32 Dev Kit C (or similar ESP32 board).
- A BME680 Environmental Sensor (temperature, humidity, pressure, gas/VOC).
- A small 5V relay module (for fan/vent control).
- Breadboard, jumper wires, and a micro USB cable for flashing.
Ensure you have the ESPHome add-on installed in Home Assistant (Supervisor > Add-on Store). Launch the ESPHome dashboard.
[Screenshot: ESPHome Dashboard in Home Assistant]
2. Create a New ESPHome Device Configuration
In the ESPHome dashboard, click '+' to add a new device. Follow the wizard, naming your device (e.g., server_rack_monitor), selecting ESP32 as the board, and configuring Wi-Fi credentials. Once created, click "EDIT" to open the YAML configuration.
3. Integrate Complex Sensors (BME680)
The BME680 provides multiple readings and requires an I2C configuration. Add this to your esphome.yaml:
# ... other boilerplate ESPHome config (wifi, ota, api) ...

i2c:
  sda: GPIO21
  scl: GPIO22
  scan: True

sensor:
  - platform: bme680
    address: 0x76 # Common address for BME680
    temperature:
      name: "Server Rack Temperature"
      unit_of_measurement: "°C"
      accuracy_decimals: 1
      state_class: measurement
      device_class: temperature
    humidity:
      name: "Server Rack Humidity"
      unit_of_measurement: "%"
      accuracy_decimals: 0
      state_class: measurement
      device_class: humidity
    pressure:
      name: "Server Rack Pressure"
      state_class: measurement
      device_class: pressure
    gas_resistance:
      name: "Server Rack Gas Resistance"
      state_class: measurement
    update_interval: 60s
This configures the I2C bus (verify your ESP32's SDA/SCL pins) and adds the sensor entities to Home Assistant. The state_class and device_class improve Home Assistant's data handling.
4. Add an Actuator (Relay for Fan/Vent)
Control a fan or vent with a relay connected to a GPIO pin, creating a switch entity:
switch:
  - platform: gpio
    pin: GPIO23 # Connect relay IN to GPIO23
    name: "Server Rack Fan Control"
    id: server_rack_fan
    inverted: True # Common for many relay modules (LOW signal activates)
Always verify the inverted: True setting for your specific relay module.
5. Flash Your ESPHome Device
Save your YAML. Connect your ESP32 via USB. In the ESPHome dashboard, click "INSTALL," then select "Plug into the computer running ESPHome Dashboard" or "Manual download" for ESPHome Web Flasher. After flashing and connecting to Wi-Fi, your device should appear online, and its entities will populate in Home Assistant.
[Screenshot: ESPHome device online in dashboard]
Troubleshooting Common Issues
Even experienced DIYers encounter problems. Here are common issues and their solutions:
- Device Not Connecting/Online: Incorrect Wi-Fi credentials, weak Wi-Fi signal, incorrect flash method, API key mismatch, or network/firewall blocking mDNS/API communication (port 6053).
- Sensor Readings Missing/Inaccurate: Double-check all wiring (SDA, SCL, VCC, GND). Use
i2c: scan: Truein your config to log found I2C devices. Verify sensor address (e.g.,0x76for BME680). Ensure adequate power supply. - Actuators Not Responding: Confirm relay wiring to GPIO, VCC/GND. Experiment with
inverted: True/False. Avoid ESP32 GPIOs 0, 2, 4, 5, 12, 15, 16 for critical outputs if possible, as they can have boot behaviors. - Debugging with Logger: Always check the ESPHome device's logs (ESPHome dashboard > LOGS). Increase log verbosity if needed:
logger:
  level: DEBUG # Change to VERBOSE for more detail
Advanced Configuration: Smart Vent Control with Custom Logic
The true power of ESPHome lies in embedding custom C++ logic using Lambdas. Let's enhance our server rack monitor into a smart vent controller. It will automatically open a vent if the temperature exceeds a threshold AND the estimated Air Quality Index (AQI) is good, and close it otherwise. This demonstrates custom data processing and on-device conditional actions, reducing reliance on Home Assistant for simple thresholds and improving responsiveness.
# ... bme680 sensor setup as above, ensure IDs are present:
#    temperature: id: server_rack_temperature
#    gas_resistance: id: bme680_gas_resistance

# Template sensor for estimated AQI (from gas resistance)
sensor:
  - platform: template
    name: "Server Rack AQI (Estimated)"
    id: server_rack_aqi
    unit_of_measurement: "AQI"
    accuracy_decimals: 0
    lambda: |-
      float gas_res = id(bme680_gas_resistance).state;
      // Simplified example: Higher gas resistance typically means better air quality
      if (gas_res > 500000) return {10}; // Excellent
      if (gas_res > 200000) return {50}; // Good
      if (gas_res > 50000) return {100}; // Moderate
      return {150}; // Poor

# Output for vent control (e.g., connected to a servo or another relay)
output:
  - platform: gpio
    pin: GPIO23 # Adjust based on your wiring
    id: vent_gpio_output

switch: # Represent as a switch in Home Assistant
  - platform: output
    output: vent_gpio_output
    name: "Server Rack Vent"
    id: server_rack_vent_ha_entity

# On-device automation: Open vent if temp > 30C AND AQI < 100, close otherwise
on_value:
  - component: server_rack_temperature # Trigger on temperature changes
    then:
      - if:
          condition:
            lambda: return x > 30.0 && id(server_rack_aqi).state < 100;
          then:
            - switch.turn_on: server_rack_vent_ha_entity
          else:
            - switch.turn_off: server_rack_vent_ha_entity
This consolidated example shows how ESPHome handles sensor readings, performs custom calculations, and executes conditional logic on-device for direct, responsive control. The vent will react instantly to changes based on both temperature and air quality thresholds without relying on Home Assistant's state machine.
Securing Your ESPHome Device
Always include an API password for your ESPHome device to prevent unauthorized access. Consider isolating your smart home devices on a separate VLAN to further enhance security.
api:
  password: "YOUR_VERY_SECRET_API_PASSWORD" # MUST be unique and strong
Real-World Example: Automated Pet Water Dispenser
Let's apply these concepts to an automated pet water dispenser that keeps track of water levels and dispenses water, ensuring fresh water for your furry friends.
Hardware Components:
- ESP32 Dev Kit
- HC-SR04 Ultrasonic Distance Sensor (for water level)
- Small Submersible 5V Pump
- 5V Relay Module (to control pump)
- Optional: OLED Display (SSD1306) to show current water level.
ESPHome Configuration Snippet:
This config combines sensor reading, actuator control, and custom display logic.
# ... boilerplate (wifi, ota, api with password) ...

i2c:
  sda: GPIO21 # For OLED
  scl: GPIO22 # For OLED
  scan: True

# Ultrasonic Distance Sensor for Water Level
ultrasonic:
  - platform: hcsr04
    trigger_pin: GPIO16
    echo_pin: GPIO17
    name: "Pet Water Level Raw"
    id: raw_water_level
    update_interval: 5s

# Template sensor to convert raw distance to percentage (adjust min/max for your setup)
sensor:
  - platform: template
    name: "Pet Water Level Percentage"
    id: pet_water_level_percentage # Important for other components to reference
    unit_of_measurement: "%"
    icon: mdi:water-percent
    accuracy_decimals: 0
    state_class: measurement
    lambda: |-
      float distance_cm = id(raw_water_level).state;
      // Assume 20cm is empty, 5cm is full. Adjust these values for your container!
      float max_level_cm = 20.0;
      float min_level_cm = 5.0;
      float percentage = ((max_level_cm - distance_cm) / (max_level_cm - min_level_cm)) * 100.0;
      return {std::max(0.0f, std::min(100.0f, percentage))}; // Clamp between 0-100%

# Pump Control (Actuator)
switch:
  - platform: gpio
    pin: GPIO23 # Connect relay IN to GPIO23
    name: "Pet Water Pump"
    id: pet_water_pump_switch
    inverted: True # Adjust based on your relay

# OLED Display (Optional)
display:
  - platform: ssd1306_i2c
    model: SSD1306_128_64
    address: 0x3C
    lambda: |-
      it.printf(0, 0, id(my_font), "Water: %.0f%%", id(pet_water_level_percentage).state);
      it.printf(0, 10, id(my_font), "Pump: %s", id(pet_water_pump_switch).state ? "ON" : "OFF");

font:
  - file: "arial.ttf"
    id: my_font
    size: 10
This ESPHome device provides the water level and pump control as entities to Home Assistant. You can then create Home Assistant automations like these:
# Home Assistant Automation to dispense water twice a day
- alias: "Pet Water Dispenser Daily Schedule"
  trigger:
    - platform: time
      at: "08:00:00"
    - platform: time
      at: "18:00:00"
  condition:
    - condition: numeric_state
      entity_id: sensor.pet_water_level_percentage
      above: 10 # Only dispense if there's enough water
  action:
    - service: switch.turn_on
      target:
        entity_id: switch.pet_water_pump
    - delay:
        seconds: 5 # Run pump for 5 seconds
    - service: switch.turn_off
      target:
        entity_id: switch.pet_water_pump

# Home Assistant Automation for low water notification
- alias: "Pet Water Low Alert"
  trigger:
    - platform: numeric_state
      entity_id: sensor.pet_water_level_percentage
      below: 10
      for:
        minutes: 5 # Trigger if low for 5 minutes to avoid flapping
  action:
    - service: persistent_notification.create
      data:
        message: "Pet water is critically low! Please refill the dispenser."
        title: "Action Required: Pet Water"
    - service: notify.mobile_app_your_device # Example for mobile notification
      data:
        message: "Pet water is low!"
[Image: Custom Pet Water Dispenser Device with ESP32 and Sensors]
Best Practices & Wrap-up
To ensure your custom ESPHome devices are robust, scalable, and secure:
- Modular YAML: For complex projects, break your
esphome.yamlinto smaller, included files (e.g.,!include sensors.yaml). This improves readability. - Version Control: Store all your
esphome.yamlfiles in a Git repository to track changes and manage multiple devices effectively. - Power Management: For battery-powered devices, optimize
update_intervaland leverage deep sleep modes to extend battery life. - OTA Updates: Utilize Over-The-Air (OTA) updates to flash new firmware without physically accessing the device.
- Network Security: Isolate smart home devices on a separate VLAN. Use strong API passwords.
- Documentation: Keep a simple record of each custom device's function, pinout, and calibration values.
By mastering custom ESPHome device development, you gain unparalleled control over your smart home, enabling you to build highly specific, powerful, and cost-effective solutions that are simply unavailable off the shelf. Start small, experiment with lambdas, and watch your smart home capabilities expand exponentially!
NGC 224
Author bio: DIY Smart Home Creator
